Categories
Life

Cooking with WiFi!!

We have lived in the Century House for about three months now and have settled in very comfortably. However, we have been living without a cookstove. We sold the ancient one that came with the house because we knew we had one on the way – soon.  We wanted all new matching appliances and ordered them in January for a March delivery. Two and half months ought to be enough time to get them shipped from ‘wherever’, right?

This proved true for the most part. Everything was fine and in place by the first of April. However, I made the mistake of ordering a super special order stove with an oven that could be split into two, with dual controls. Along with this, my wife ordered a microwave with all the bells and whistles. You clearly see our cooking styles.

The Empty Spot in my Kitchen

The last two items, the stove and the microwave, did not show up on time. However, to add to the story, we were contacted several times to schedule deliveries that never materialized. The supplier both called and emailed us to schedule the delivery of our products but then didn’t show up at all. They were phantom deliveries. It was very frustrating.

Then the Suez canal blockage happened. The container ship Ever Given had run aground in the middle of the canal and blocked delivery of our stove. At least that was the story we were telling.  We don’t know the exact reason for the delay, but it worked well for laughs.

In the meantime, we have been getting by with a $75 microwave and a $25 electric griddle. We tried using our slow cooker to prepare meals ahead, but you know “SLOW COOKER” is not something we wanted to use daily. Instead, we got very comfortable with our griddle and had lots of eggs, salmon burgers, and fish fillets. All of which was fine and tasty, but I really missed a good fried egg or a stir fry or even mac-n-cheese.

$25 worth of saddness!!

Soon after we moved in, we had a technician in the house installing our security system. The control panel is in the kitchen opposite the stove – or where the stove is supposed to be. He had been at it for about thirty minutes before he finally looked up and asked: “Where’s your stove?” It took him that long to notice the odd empty spot in our kitchen.

I found it difficult to adjust to cooking on an electric griddle. I love to cook, and cutting a bunch of vegetables into a stew or a stirfry is very relaxing for me. But cooking on a griddle doesn’t require much for cutting. It was all fish fillets, chicken breasts, and patties with lots of salads. The ‘cooking’ part of cooking was a sad shadow of what I liked to do. I’m sure I could have gotten used to the griddle and eventually felt creative enough to do something interesting with it, but thankfully that time was avoided.

We have a stove! It’s a Samsung gas range with an oven that can be split into two and controlled separately. It also includes an air fryer option that I am particularly excited about. My wife wants me to make wings in the worst way, but I guess there is a chicken wing shortage or something. She was unwilling to trade an arm and a leg for wings. So, that will have to wait.

I am excited about the high-powered burner on the cooktop. It is meant for cooking with a wok. My wok is my favorite pan to use. I make a lot of stir fry and curries and similar recipes.

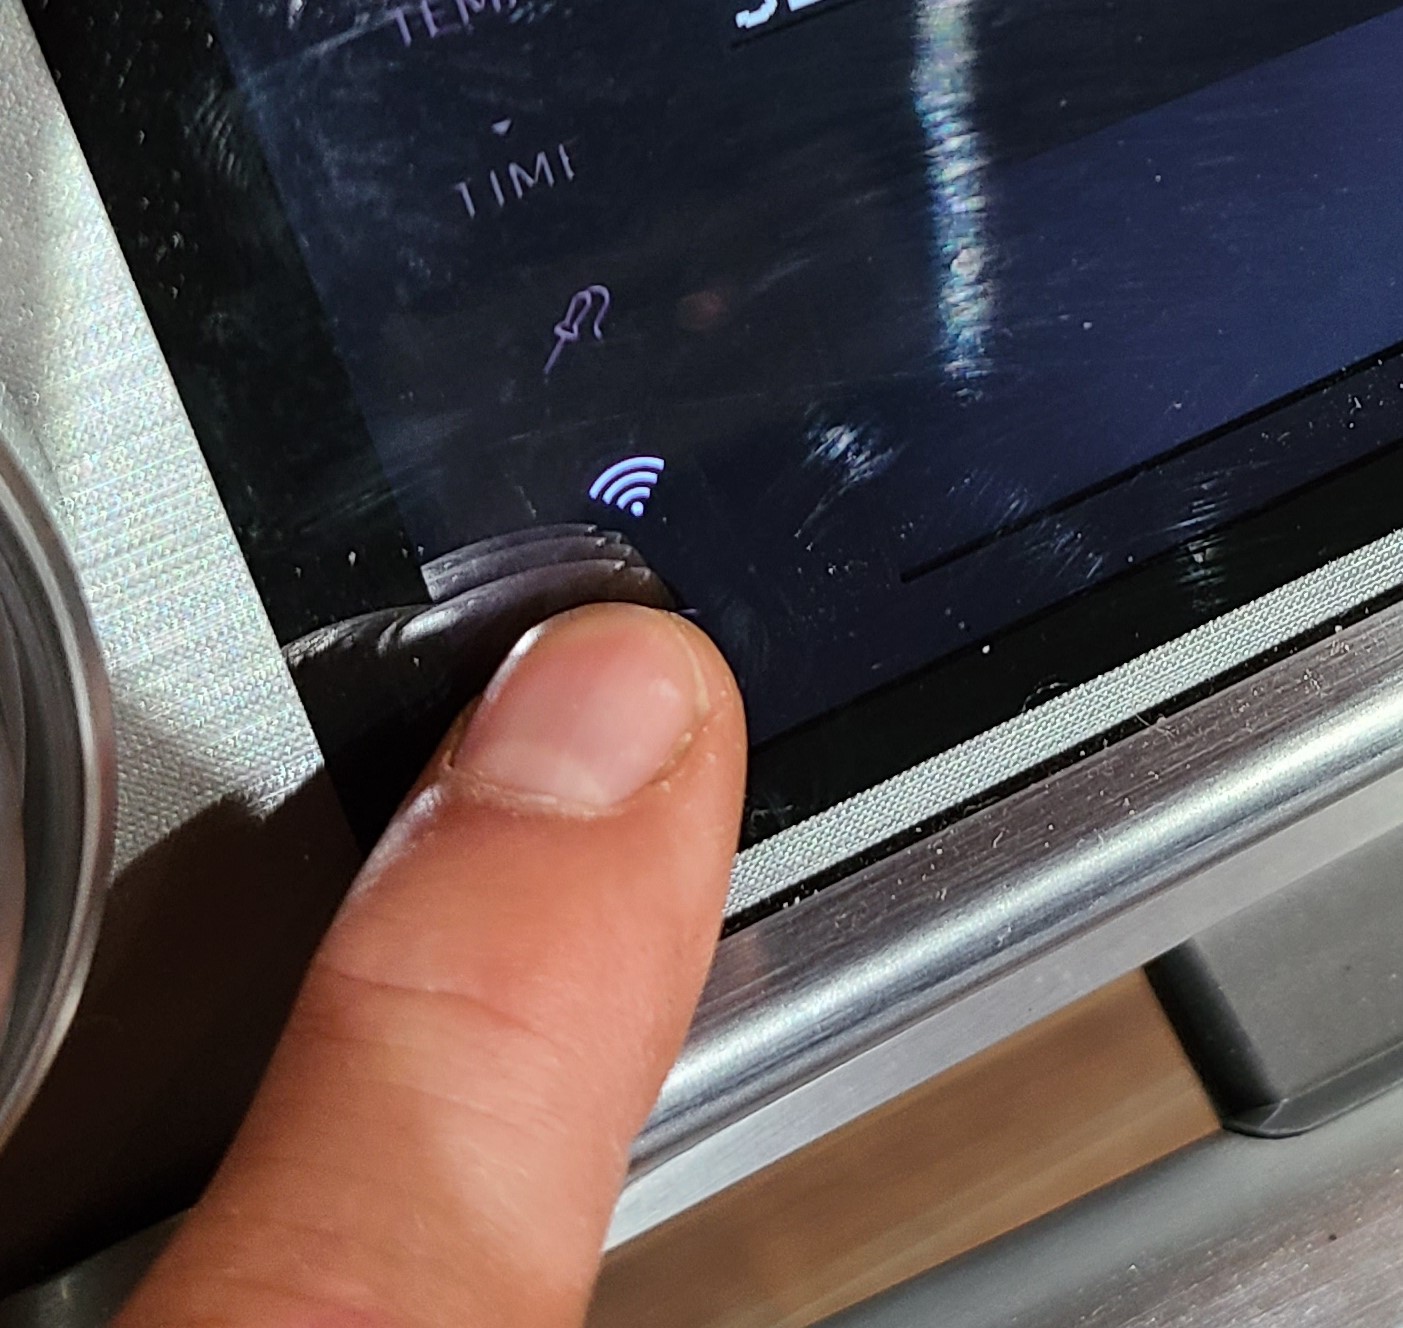
This is the first cookstove I’ve purchased new, and there is a huge big technology jump in this range compared to what I’m used to.  I can control the oven from my phone! Which is ridiculous! I have never once thought: Damn… if only I could turn the oven on from the mall. I personally can’t see the use of this feature. My wife has offered different scenarios to justify it. Still, none of them ring true or reasonable or an event that would happen more than once in a lifetime. However, my phone is now synced with my stove, and I’m going to dream up some weirdly unlikely situation where I will just have to use it.

Frickin’ WIFI!!!

What is the first thing I cooked on my new stove, you ask? Was it chicken marsala? Or a stir fry or a nice spicy curry (YUM!!) or some other fancy or difficult or iconic meal that would inaugurate my new stove in style. No… That is definitely not my style. Simple cooking is the best cooking. I made fried eggs, sausage, and toast. And it was glorious. I never got the hang of cooking eggs on the griddle. They were never quite right.

Categories
DIY

Century House 6: Basement Floor Install

Our hundred year old basement has really good concrete. The floors are still crack-free and flat and the walls don’t show any sag or bowing. However, we don’t know how dry the basement has been in the past, so we decided to be safe and chose a waterproof laminate flooring for the main area. It is an engineered laminate that is designed to snap together. My initial plan was to do the whole floor in the TV/bar area in one go. But it turned out that my floor didn’t meet the exact requirements. The laminate requires a very flat and even floor. I poopooed this as over-specifying and felt that I could make it work on my sort of flat hundred year old concrete. I can admit that I was wrong. I failed to take into account that the basement has two floor drains and nice gradual slopes leading to each.

I found that there was not enough play in the joints of the laminate to allow for the slight curve of the slope. I was forced to limit the laminate to the large open areas in the center of the room. My altered plan had me putting down laminate in the main room and a portion of the guest room. Behind the bar I will put down a nice tile and on the sloped sections around the drains will be creating a mosaic with small 2″ tiles. The colors of the materials are similar and I think it will look nice in the end.

I didn’t want to put the laminate directly onto the concrete because of moisture gassing up through the concrete and other possible seepage in the future. I installed a dimpled underlayment that raised the laminate about 3/8″ and provided a vapor gap under the flooring. I will be keeping the drains in the floor. I have hot water heat, a boiler and lots of pipes in the ceiling of the room. I want easy access to the drains for any moisture that accumulates.

I did a lot of research before installing the underlayment and laminate. I wanted to do this myself, do it right, and do it once. So I was not going to rush into anything.

First, I filled in the joints in the floor with some left over hydraulic cement to provide a smooth flat surface for the floor. Any defects, dips or grooves in the concrete would be translated to the floor above it. Next, I put down the underlayment leaving a gap along the walls. This was all done in a weekend. I then put the laminate down during the week, working a couple of hours a night. It took some practice and some mistakes to get the engineered laminate to go together consistently, it is very brittle and the joints break easily.

Also, because the joints are so tight with very very little give, any joint that isn’t perfectly tamped together will build up and become a problem several rows later. So, rather than being perfectly straight and flat, the floor develops a hump or slight curve that you can’t easily correct. As I said, it took some time and mistakes to get it right, but I completed it in the end and it looks great. There were some harsh words and thrown tools, but this DIY Engineer triumphed in the end. But I also want to say that I will NEVER do this again! I will also not recommend this flooring. I should have just tiled the entire floor. I suspect I will be replacing this floor in about five years. I’m not a fan.

Categories
DIY

Century House 5: Basement Walls

The remodel of the basement has progressed well. Once it was gutted, cleaned up, and the walls sealed I felt that I need to add a little insulation to the walls to prevent the rooms from getting that clammy basement feel. I used a half inch thick aluminum clad insulation that is commonly used for garage doors.

For the framing, I am fortunate to have an 8ft basement ceiling! This meant that I didn’t have to cut any of those uprights. I used treated lumber for the bottom plates and anchored them to the floor, with the headers attached to the floor joists to keep it all plumb.

This basement is a century old and actually looks great. However, I found that the walls did bulge a little. Getting everything plumb required a some adjustments and a small amount of rework and cursing, but it all turned out in the end.

Now, I did the framing myself. Meaning – by myself – me and my new Dewalt impact-driver. I had a good time, but ended up with tennis-elbow or something. My gripping elbow is killing me. My guess is tendonitis and I’ve got ice and a compression sleeve on it. No one every warned be about that kind of injury.

This project has now cured me of any desire to do drywall. I’ve done some in the past, but not in a while. I now have a hatred for drywall. Our mantra for this project has become: ‘Never again.’ This is honestly our last project house. We just need to finish it.

Our plan is to leave all the pipes in the basement exposed and create a steam-punk or old industrial theme. The water main comes through the wall in our TV room and I didn’t want to cover it. So, I did some creative framing around it. I think it turned out pretty good. Later, I want to cover it with a perforated brass grill with some mood lighting behind it. That will be later.

Next Post: Laminate flooring!!

Categories
Uncategorized

Hydraulic Cement

When we removed the old drywall and studs, we discovered a wide crack in our basement wall. There wasn’t any indication of water leaking in, but it was crumbly and old in place. I would have to fix it. I’ve never repaired a crack like this, so this was going to be another learning experience! Google and YouTube were my instructors.

First I had to open up the crack with an air hammer. (Another use for the new air compressor!) Your supposed to chip away material to create and undercut that will hold the cement in place after the repair. However, they really knew how to make cement a hundred years ago. It was very hard and stubborn in places.

The repair itself was a bit of fun. Once all the loose dust and dirt was blown out of the crack, I used my gloved hands to squeeze cement deep into the back of the crack. Hydraulic cement is a very finely sanded mortar that sets up FAST. You only mix what you can use within about three minutes. By that point it starts to harden and stick to the bucket.

The cement is mixed really thin so you can squeeze it into the small recesses in the wall. Again, I used my gloved hands for this. It’s very much like playing with mud. I enjoyed it thoroughly and expect I will be using this stuff more often. I’m not sure for what, but it’s too cool of a material not use for something.