Now that the temperatures have cooled to the point where I’m not completely melting away, I’ve been spending a portion of my weekends working outside in my yard.
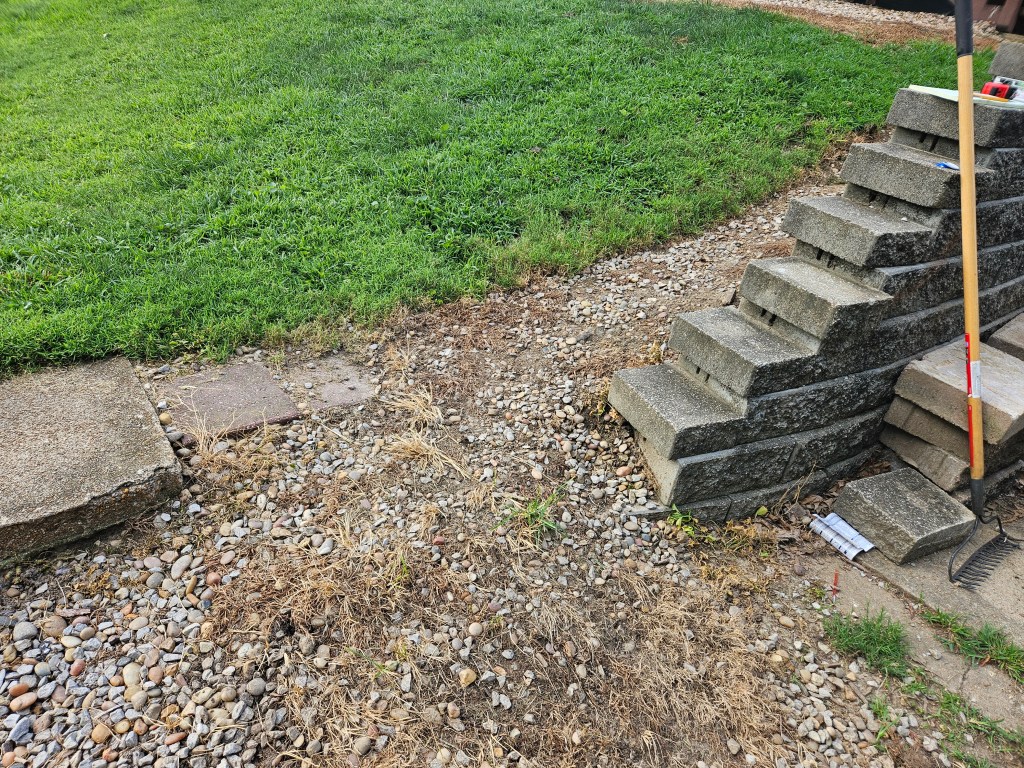
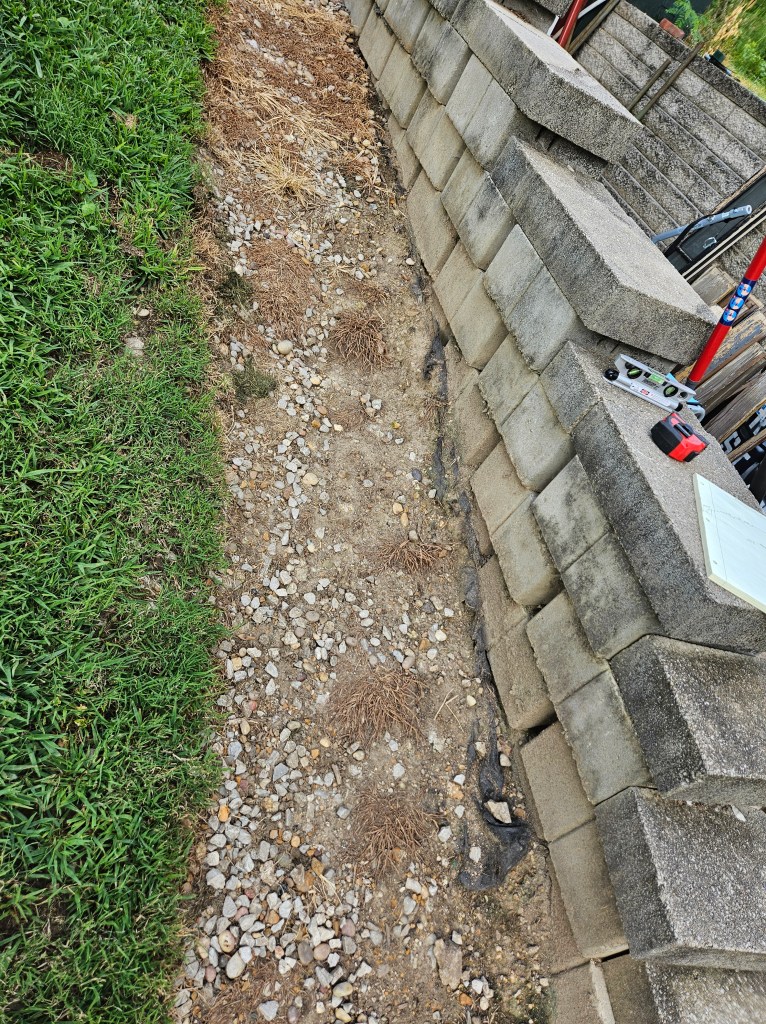
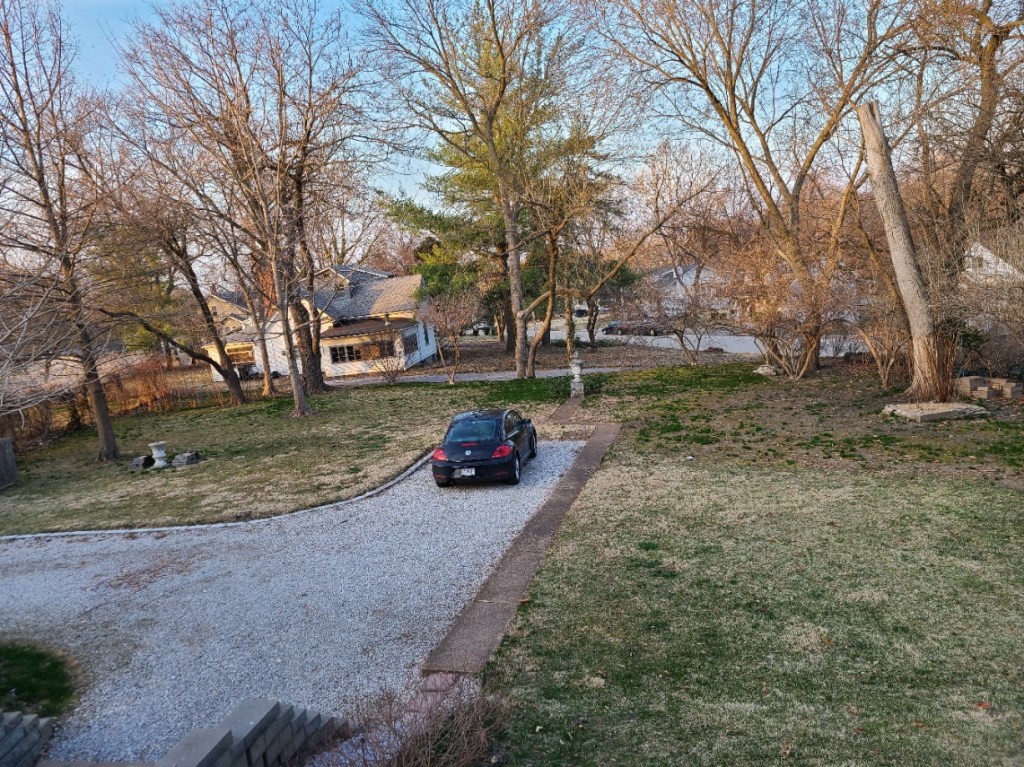
The project I completed this weekend was to install some stairs down to our driveway from the back door. We have a small porch and some wooden stairs to the ground but there was still a slope down to the gravel parking area. At one time there were stairs but they were removed to pass inspection to sell the house. We’ve put up with the stoney path for three years, but it tended to get slick in the winter and we’ve both taken spills on it.
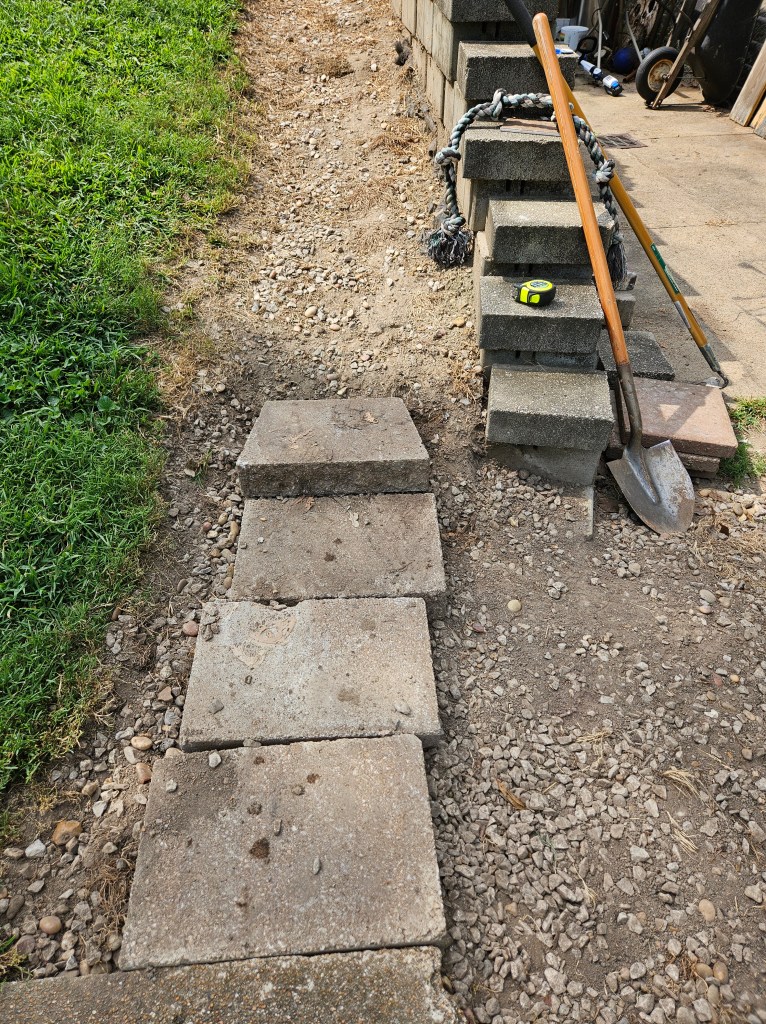
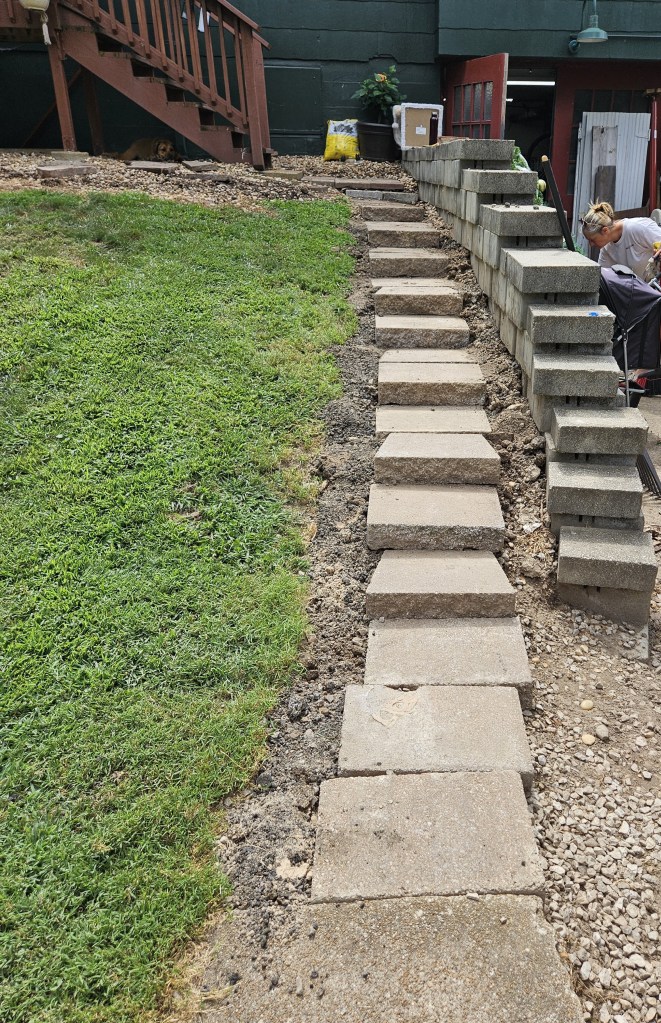
My task has been to reinstall steps along the same path. I used landscape pavers left over from past projects and only installed them into the dirt rather than with concrete. We will be remodeling our back stairs in a couple of years and adding a breakfast deck so the stairs will be replaced with permanent then. At this point, I just needed some sturdy temporary steps.
I started at the bottom of the slope, dug out, and leveled a place for each step. I was very much making it up as I went along. I had a sort of plan and just made it work. I think it turned out alright and my wife is very satisfied. She now wants a handrail and I happen to have some old steel pipe that I can repurpose for that project. Details of that will be posted when complete. But next, I need to dig up an old foundation in my yard.
I have been away from the blog for a bit because of other activities. I’ve been busy, and there is only so much time in the day. I do have some writing in the works, but most of my time has been spent working on the house. We have been living here for a year and have made significant progress. Not enough to totally please the Goddess, yet enough to make it livable.
One of my projects was to mount the microwave oven in the kitchen. Leaving it sitting on the counter was never going to fly.
Our century house was never meant to have a big kitchen, which is sad. I am the cook and would love a well-laid-out kitchen. I will never have one in this house and have come to terms with that. However, I think we can still make our kitchen awesome until we can do a full remodel one of these days.
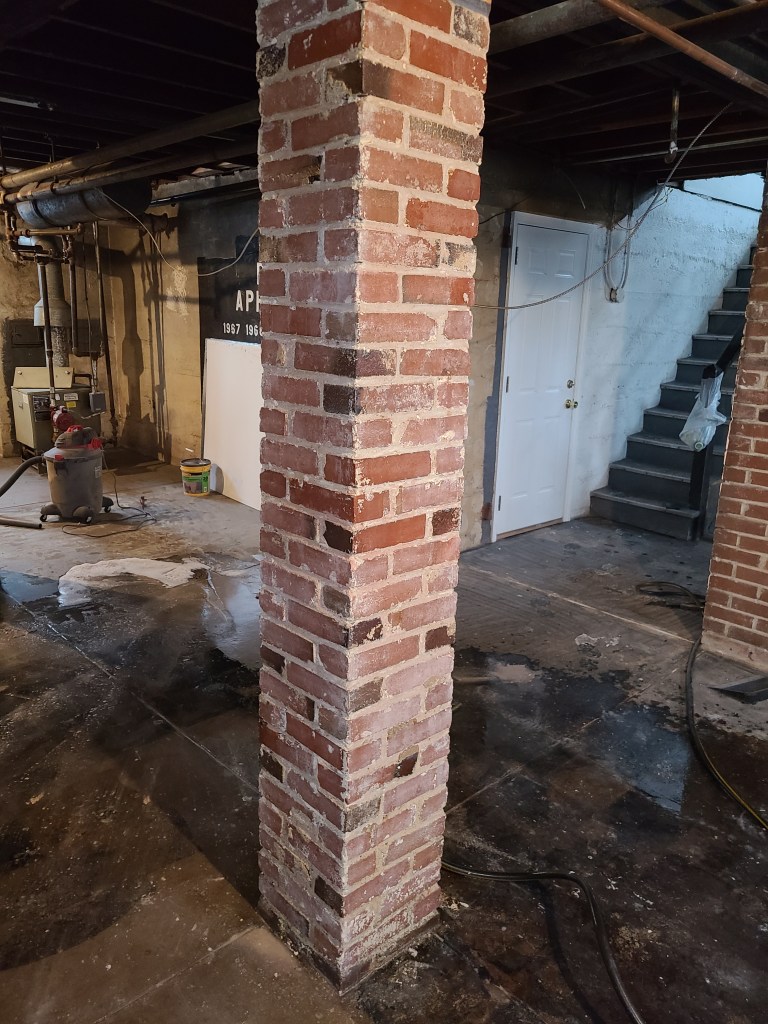
The room has an exposed chimney with bare brick, which looks cool as hell. But the mortar is beginning to crumble a little and we didn’t want to repair it because that would ruin the effect.
What’s better: new brickwork or 100-year-old brickwork?
My stove sits in front of the chimney, and I wanted to mount our big-ass microwave above it. This was a great plan but not an easily executed one. The chimney is beginning to crumble a little, and I didn’t want my microwave falling on anyone sometime in the future.
I approached this project as an engineer.
There was no place for me to support the microwave from above; it would need to hang from the bricks alone.
There were no commercial solutions that would fit my needs.
I will have to create something!
(Evil laugh while rubbing my hands together!)
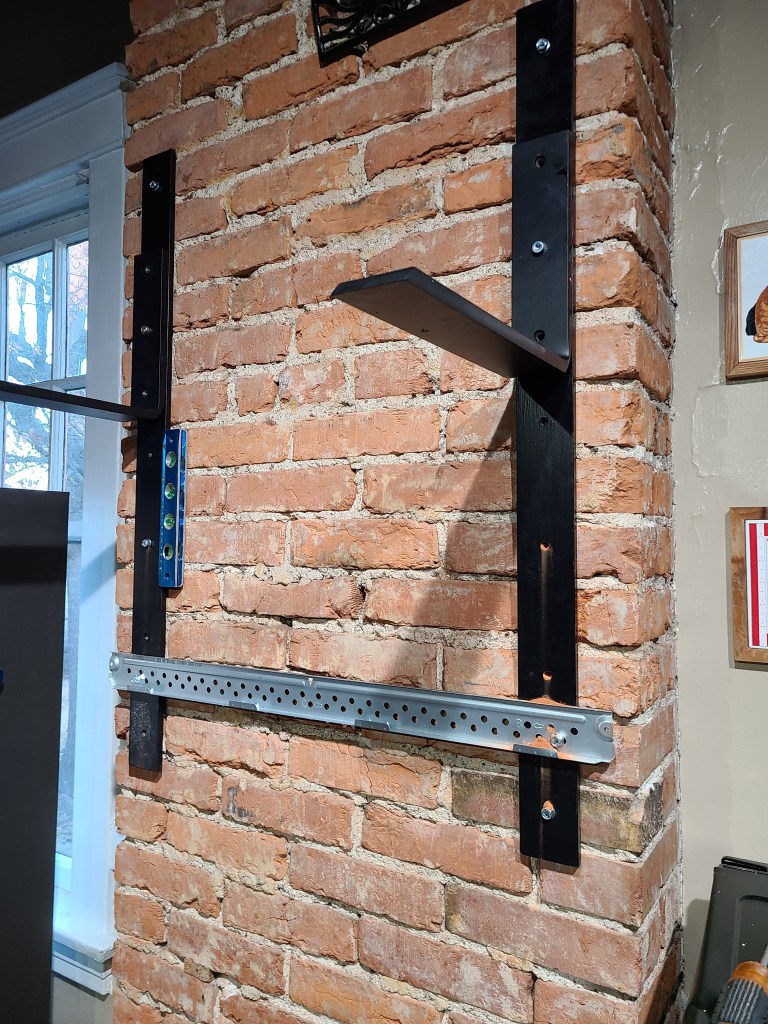
I purchased some heavy-duty countertop brackets used for marble counters. They were strong enough to support the microwave alone, but the bricks were not. I would need to provide much more of a connection to the chimney. To give the brackets something to connect to, I purchased some steel strips and drilled them to match the hole pattern of the brackets. I wanted plenty of connection points with the brick.
Old brick has a tendency to crack easily, which is BAD! And I also avoided drilling into the crumbly mortar, I couldn’t rely on it to hold over time. I carefully drilled into the bricks and used anchor bolts to attach the brackets to the wall.
Then together, we hung the microwave and pushed the stove back into place. I still need to vent the fan somehow – venting back into the room doesn’t really do much.
I think it looks amazing. I am very happy with the results.
My wife seems to have a thing for chainsaws. She’s never run one, but I used one regularly in my youth. I grew up with a wood stove to heat the house, and a chainsaw was a normal thing for me. But I’ve never seen the need to have one since. Yet, it somehow became a hot topic once we began our search for a house.
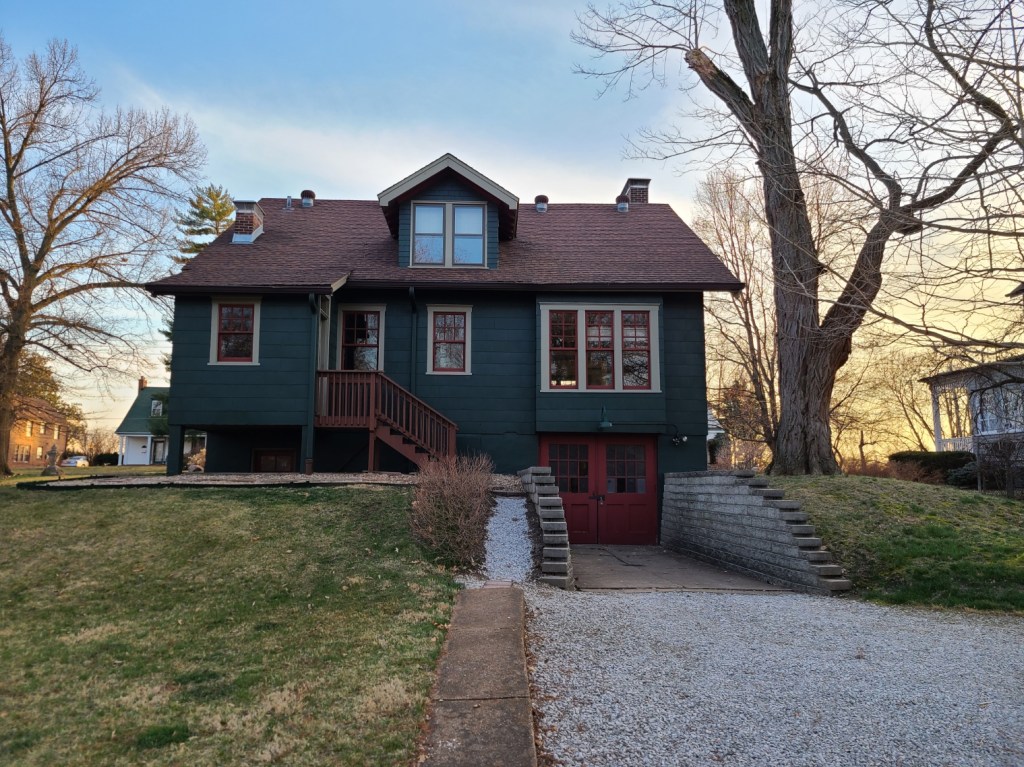
The new house has a large yard with lots of trees, which is one reason we purchased it. Our basic requirements were simple: an old house with a big yard and trees. We love trees and shade and squirrels. The house is a hundred years old, and several of the trees may be that old or more.
Shortly after moving in, I noticed that the large locust tree next to the house was beginning to show its age and would need to be removed within the next five years. I was hoping to get a little time before I really needed to address it. However, over the summer, we had a few severe storms that knocked off several large limbs. Luckily there was no damage to the house, though it was a close call. The tree is nearly four feet wide at the base and probably 60 feet tall. For most of a hundred years, it has provided the house with shade, and I hate to see it go. But now, most of the top limbs are missing or damaged and dying.
The Old Locust
Which has brought the topic of a chainsaw back to the fore. Yes, we have trees now, but I had no intention of trimming them myself. Even though we have a fireplace, I had every intention of buying pre-cut wood for it. We live in St Louis, in the city; I saw no need for a chainsaw.
Shortly after moving in, my stepson brought me a $2 chainsaw he’d purchased at a garage sale. He is not mechanically inclined but figured I could get it running. He was right. I am very familiar with chainsaws and their repair. For $10, I was able to get the little junker running, just in time to cut up a couple limbs that fell next to the house. It took all of fifteen minutes to cut and clean up.
$2 Chainsaw
Most of the work done.
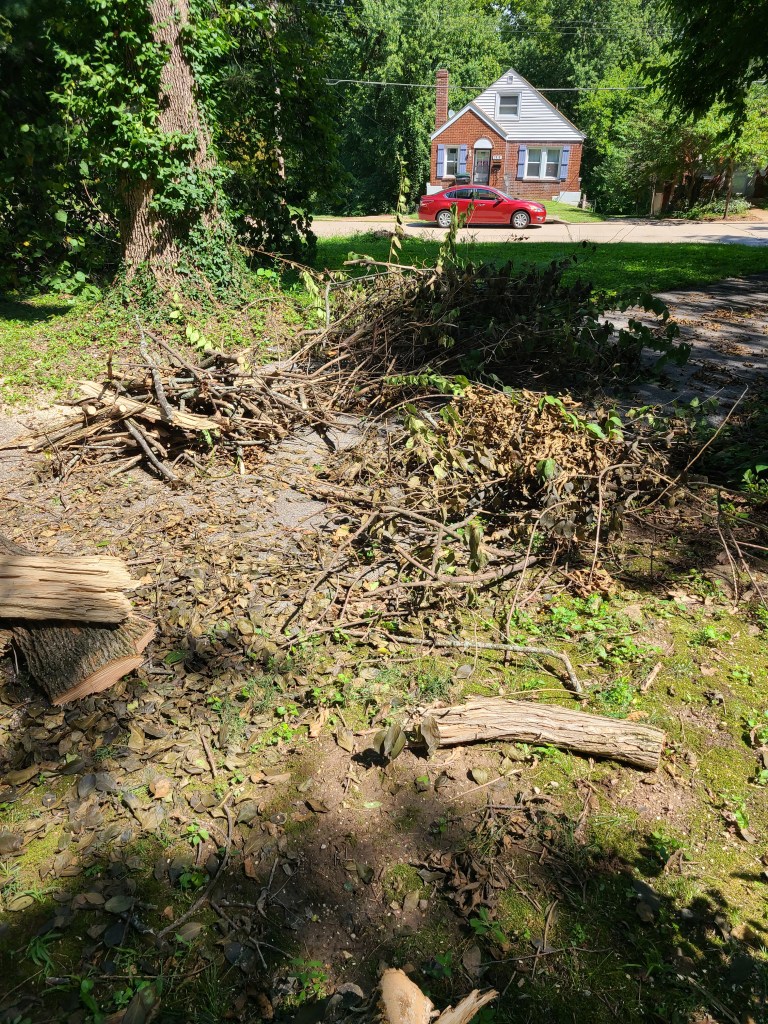
Then a couple of weeks ago, we got hit by another doozy of a storm. It threw down one of the trees in the empty yard behind us. The falling tree tore out several of my honeysuckle bushes and damaged some other trees. The most significant limb was probably 20 inches thick. That is a good-sized tree.
I pulled out my repaired and newly sharpened chainsaw and set out to get the job done. However, three cuts into the project, the saw stopped. I never got running again. I wore myself out pull-starting the POS. As you can imagine, I was pissed by this time.
Behind me I could hear my wife quietly saying: “Just go buy a chainsaw… Just go buy a chainsaw…”
As you can probably guess: I bought a Damn Chainsaw!
The New Chainsaw
Next years firewood!
Rather than getting the $140 Craftsman model (I don’t trust Craftsman anymore), I stepped it up to the $300 Husqvarna model. I am partial to the Husqvarna due to past experience and expect this to be my LAST chainsaw. I fought this purchase for long enough that I only wanted to do it once. It’s a nice saw, and I won’t be using it much. Therefore, there is no reason it shouldn’t last the life of its owner.
So, now I have a chainsaw. I expect the neighbors to soon come knocking.
“I hear you’ve got a chainsaw…”
Having a chainsaw is a lot like having a pickup truck; all your friends without one will want to borrow it. (I also don’t have a pickup… yet.)
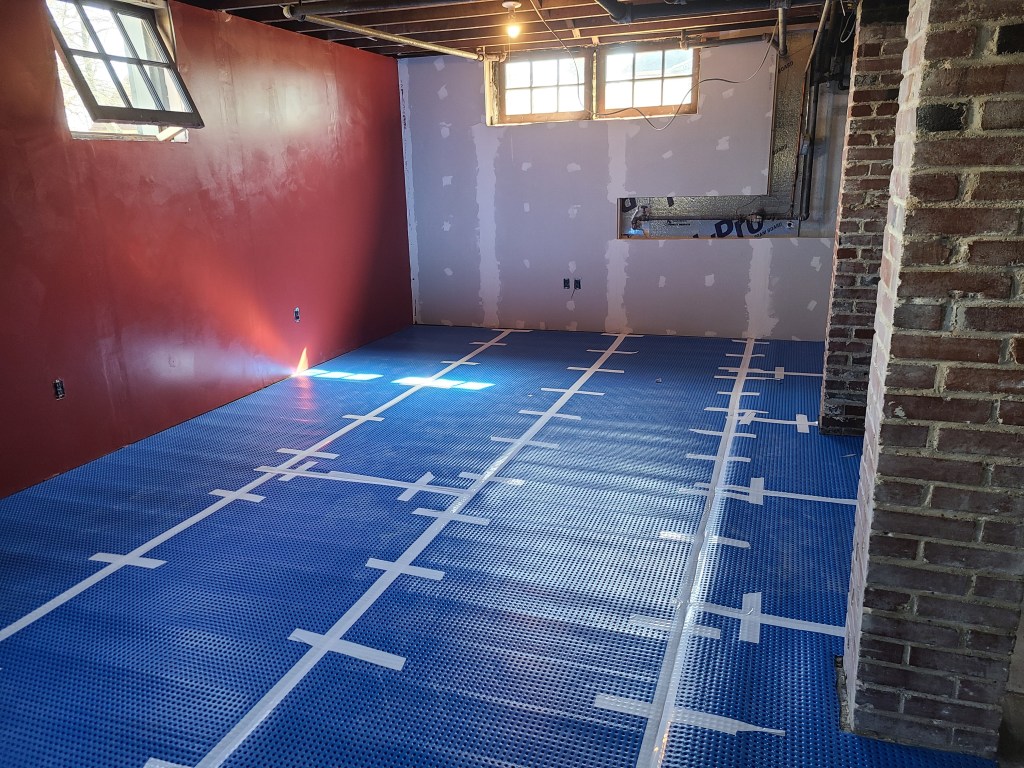
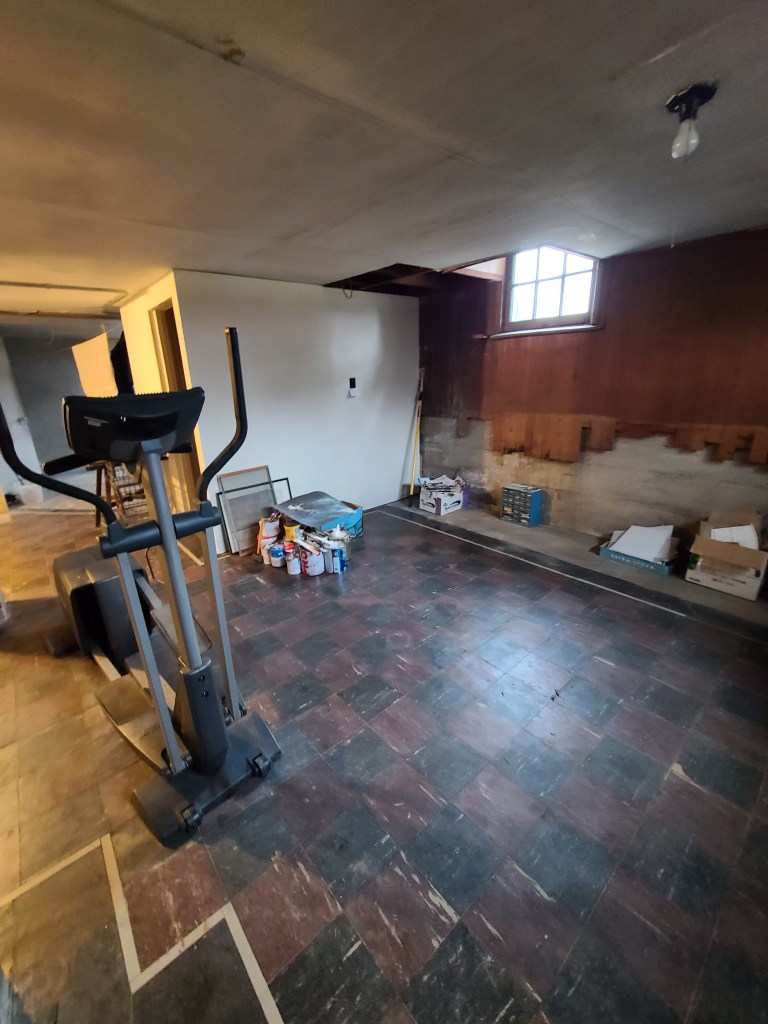
Our hundred year old basement has really good concrete. The floors are still crack-free and flat and the walls don’t show any sag or bowing. However, we don’t know how dry the basement has been in the past, so we decided to be safe and chose a waterproof laminate flooring for the main area. It is an engineered laminate that is designed to snap together. My initial plan was to do the whole floor in the TV/bar area in one go. But it turned out that my floor didn’t meet the exact requirements. The laminate requires a very flat and even floor. I poopooed this as over-specifying and felt that I could make it work on my sort of flat hundred year old concrete. I can admit that I was wrong. I failed to take into account that the basement has two floor drains and nice gradual slopes leading to each.
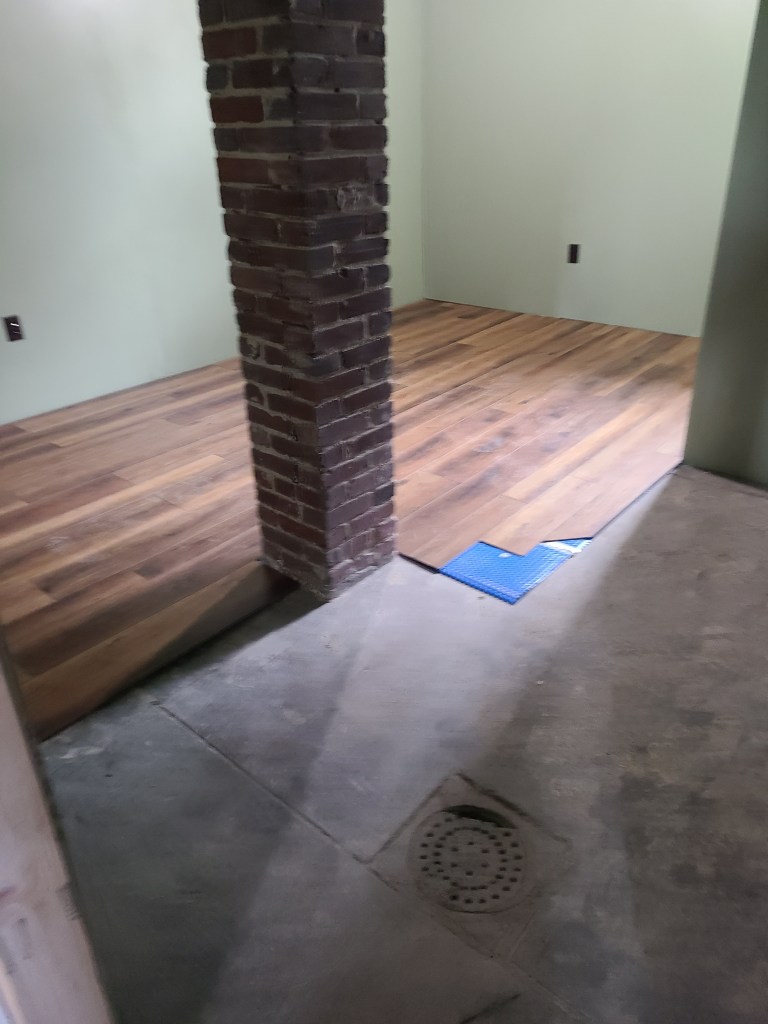
I found that there was not enough play in the joints of the laminate to allow for the slight curve of the slope. I was forced to limit the laminate to the large open areas in the center of the room. My altered plan had me putting down laminate in the main room and a portion of the guest room. Behind the bar I will put down a nice tile and on the sloped sections around the drains will be creating a mosaic with small 2″ tiles. The colors of the materials are similar and I think it will look nice in the end.
I didn’t want to put the laminate directly onto the concrete because of moisture gassing up through the concrete and other possible seepage in the future. I installed a dimpled underlayment that raised the laminate about 3/8″ and provided a vapor gap under the flooring. I will be keeping the drains in the floor. I have hot water heat, a boiler and lots of pipes in the ceiling of the room. I want easy access to the drains for any moisture that accumulates.
I did a lot of research before installing the underlayment and laminate. I wanted to do this myself, do it right, and do it once. So I was not going to rush into anything.
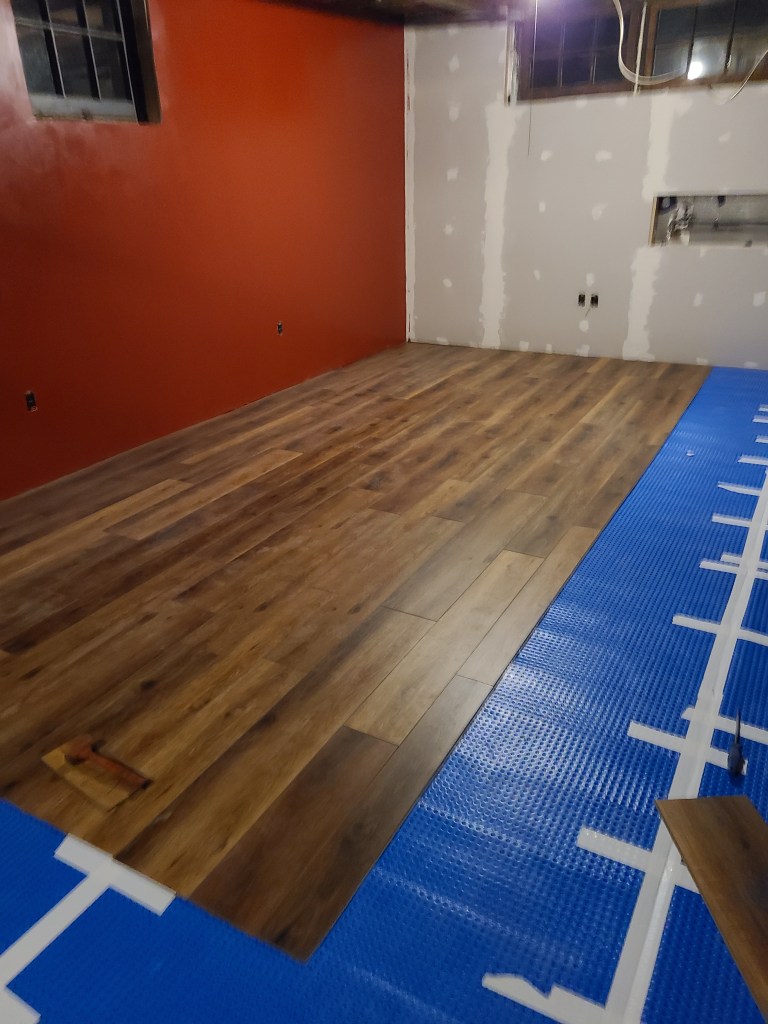
First, I filled in the joints in the floor with some left over hydraulic cement to provide a smooth flat surface for the floor. Any defects, dips or grooves in the concrete would be translated to the floor above it. Next, I put down the underlayment leaving a gap along the walls. This was all done in a weekend. I then put the laminate down during the week, working a couple of hours a night. It took some practice and some mistakes to get the engineered laminate to go together consistently, it is very brittle and the joints break easily.
Also, because the joints are so tight with very very little give, any joint that isn’t perfectly tamped together will build up and become a problem several rows later. So, rather than being perfectly straight and flat, the floor develops a hump or slight curve that you can’t easily correct. As I said, it took some time and mistakes to get it right, but I completed it in the end and it looks great. There were some harsh words and thrown tools, but this DIY Engineer triumphed in the end. But I also want to say that I will NEVER do this again! I will also not recommend this flooring. I should have just tiled the entire floor. I suspect I will be replacing this floor in about five years. I’m not a fan.
The remodel of the basement has progressed well. Once it was gutted, cleaned up, and the walls sealed I felt that I need to add a little insulation to the walls to prevent the rooms from getting that clammy basement feel. I used a half inch thick aluminum clad insulation that is commonly used for garage doors.
For the framing, I am fortunate to have an 8ft basement ceiling! This meant that I didn’t have to cut any of those uprights. I used treated lumber for the bottom plates and anchored them to the floor, with the headers attached to the floor joists to keep it all plumb.
This basement is a century old and actually looks great. However, I found that the walls did bulge a little. Getting everything plumb required a some adjustments and a small amount of rework and cursing, but it all turned out in the end.
Now, I did the framing myself. Meaning – by myself – me and my new Dewalt impact-driver. I had a good time, but ended up with tennis-elbow or something. My gripping elbow is killing me. My guess is tendonitis and I’ve got ice and a compression sleeve on it. No one every warned be about that kind of injury.
This project has now cured me of any desire to do drywall. I’ve done some in the past, but not in a while. I now have a hatred for drywall. Our mantra for this project has become: ‘Never again.’ This is honestly our last project house. We just need to finish it.
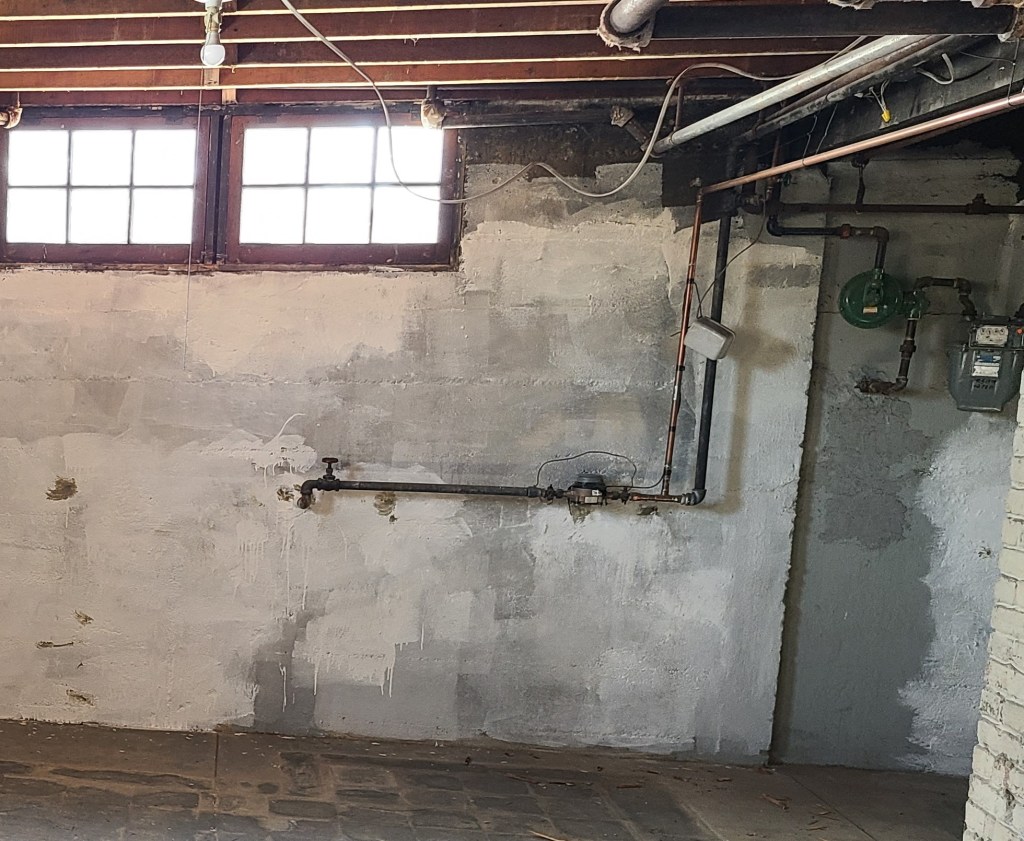
Our plan is to leave all the pipes in the basement exposed and create a steam-punk or old industrial theme. The water main comes through the wall in our TV room and I didn’t want to cover it. So, I did some creative framing around it. I think it turned out pretty good. Later, I want to cover it with a perforated brass grill with some mood lighting behind it. That will be later.
The last two weeks have been very busy at the century house. So busy in fact that I’ve neglected to post anything. Sorry.
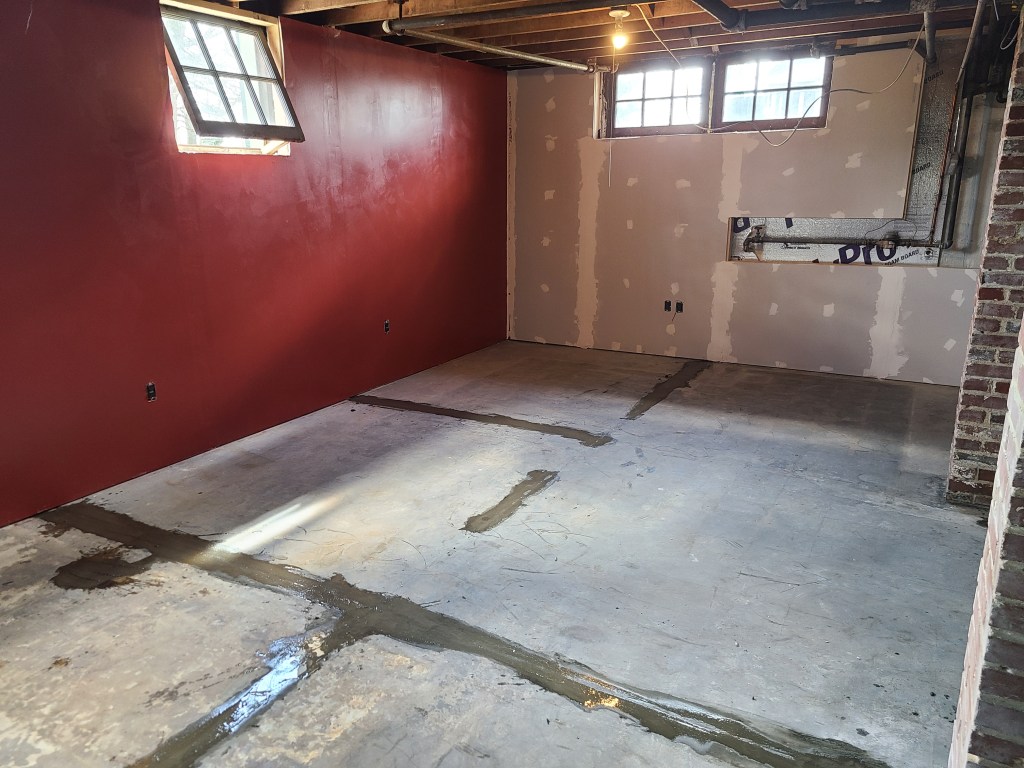
So Sheri has been busy taping and painting the kitchen and my office. She really hates painting, but since she can’t frame walls or lay flooring she gets to paint. I even volunteered to paint my own damn office, yet she ended up doing that too. The kitchen turned out great. We happen to like accent walls and went with a dark red called Sangria for the kitchen. The remaining walls are painted light brown Mocha. Honestly, this was a unconscious coincidence. However, it works with the theme – a kitchen painted in wine and coffee colors – perfection!
We have also purchased a new kitchen island that we will be installing once all the new appliances are delivered. Next week!! Aaahh!
While Sheri was busy with that, I was framing in our new TV room and guest bedroom in the basement. The worst thing I ran into while framing was that some of the walls were bulged out in the middle. I think this was part of the original pour but had to account for it when anchoring the base runners. The walls are pretty close to level all around now. There are a lot of pipes and windows in the basement that required some fancy framing around them that I will highlight in another post. That was the fun part.
However, I personally hate installing drywall and grumbled though this part of the project. I keep telling myself that this is the last time. This is my last house remodel. Seriously.
But I have a good start on the drywall now and have started planning the flooring for the rooms. This is where I ran into a major issue. We intended to put down wood laminate throughout the basement. However, I found that there was too much slope around the drains. It is a very nicely done poured floor that gently slopes down to drains in two places. However, there is a three inch difference between the outside wall and the main drain – the one in the bedroom. The laminate will work with small variations in the floor but that is way too much. We will still use the laminate for the center of the main room and most of the bedroom while we look for other options for the area where the slope is the worst. I’m leaning toward ceramic tile and a mosaic around the drain. I have my eye set on a very nice rusted steel-look tile for the bar area and a small brick-like tile for the drain area that I can place individually to create the mosaic look that I want.
The biggest problem in making any of the flooring work is drainage. We have hundred year old walls that weep a little. We also have a boiler system that has the potential for leaking. Meaning we have to leave the drains alone and provide unobstructed access for the any water. To accomplish this, I will be using an underlayment beneath the laminate that provides both a vapor barrier and drainage for any water that leaks in. But… I have a bit of research to do before I can really be sure of my plan. Lucky for me there are ambitious DIYers like myself that have already made the mistakes. I am on a few forums and sites dedicated to DIYers that have provided good sound advice so far and I will be looking through there over the next week before I actually do any floor work.
We are only three weeks away from moving into out new home and are in a rush to get everything done. I won’t have the basement completed as planned but I will have most of it useable. The bar and the bathroom will have to be finished later. I am also adding a laundry room on the second floor and will need to step away from the basement to get that roughed in. The new washer and dryer are being delivered next week and need to be functional from day one.
I have a very very busy three weeks coming up to make the house workable. We are very excited to move in and be done with the daily commute we make to work on the house. It will be nice to be right there to work on things and then have the option of just going up to bed, rather than needing to cleanup and drive across town every night.
Our heart is already in our new home, we just have to rest of us there.
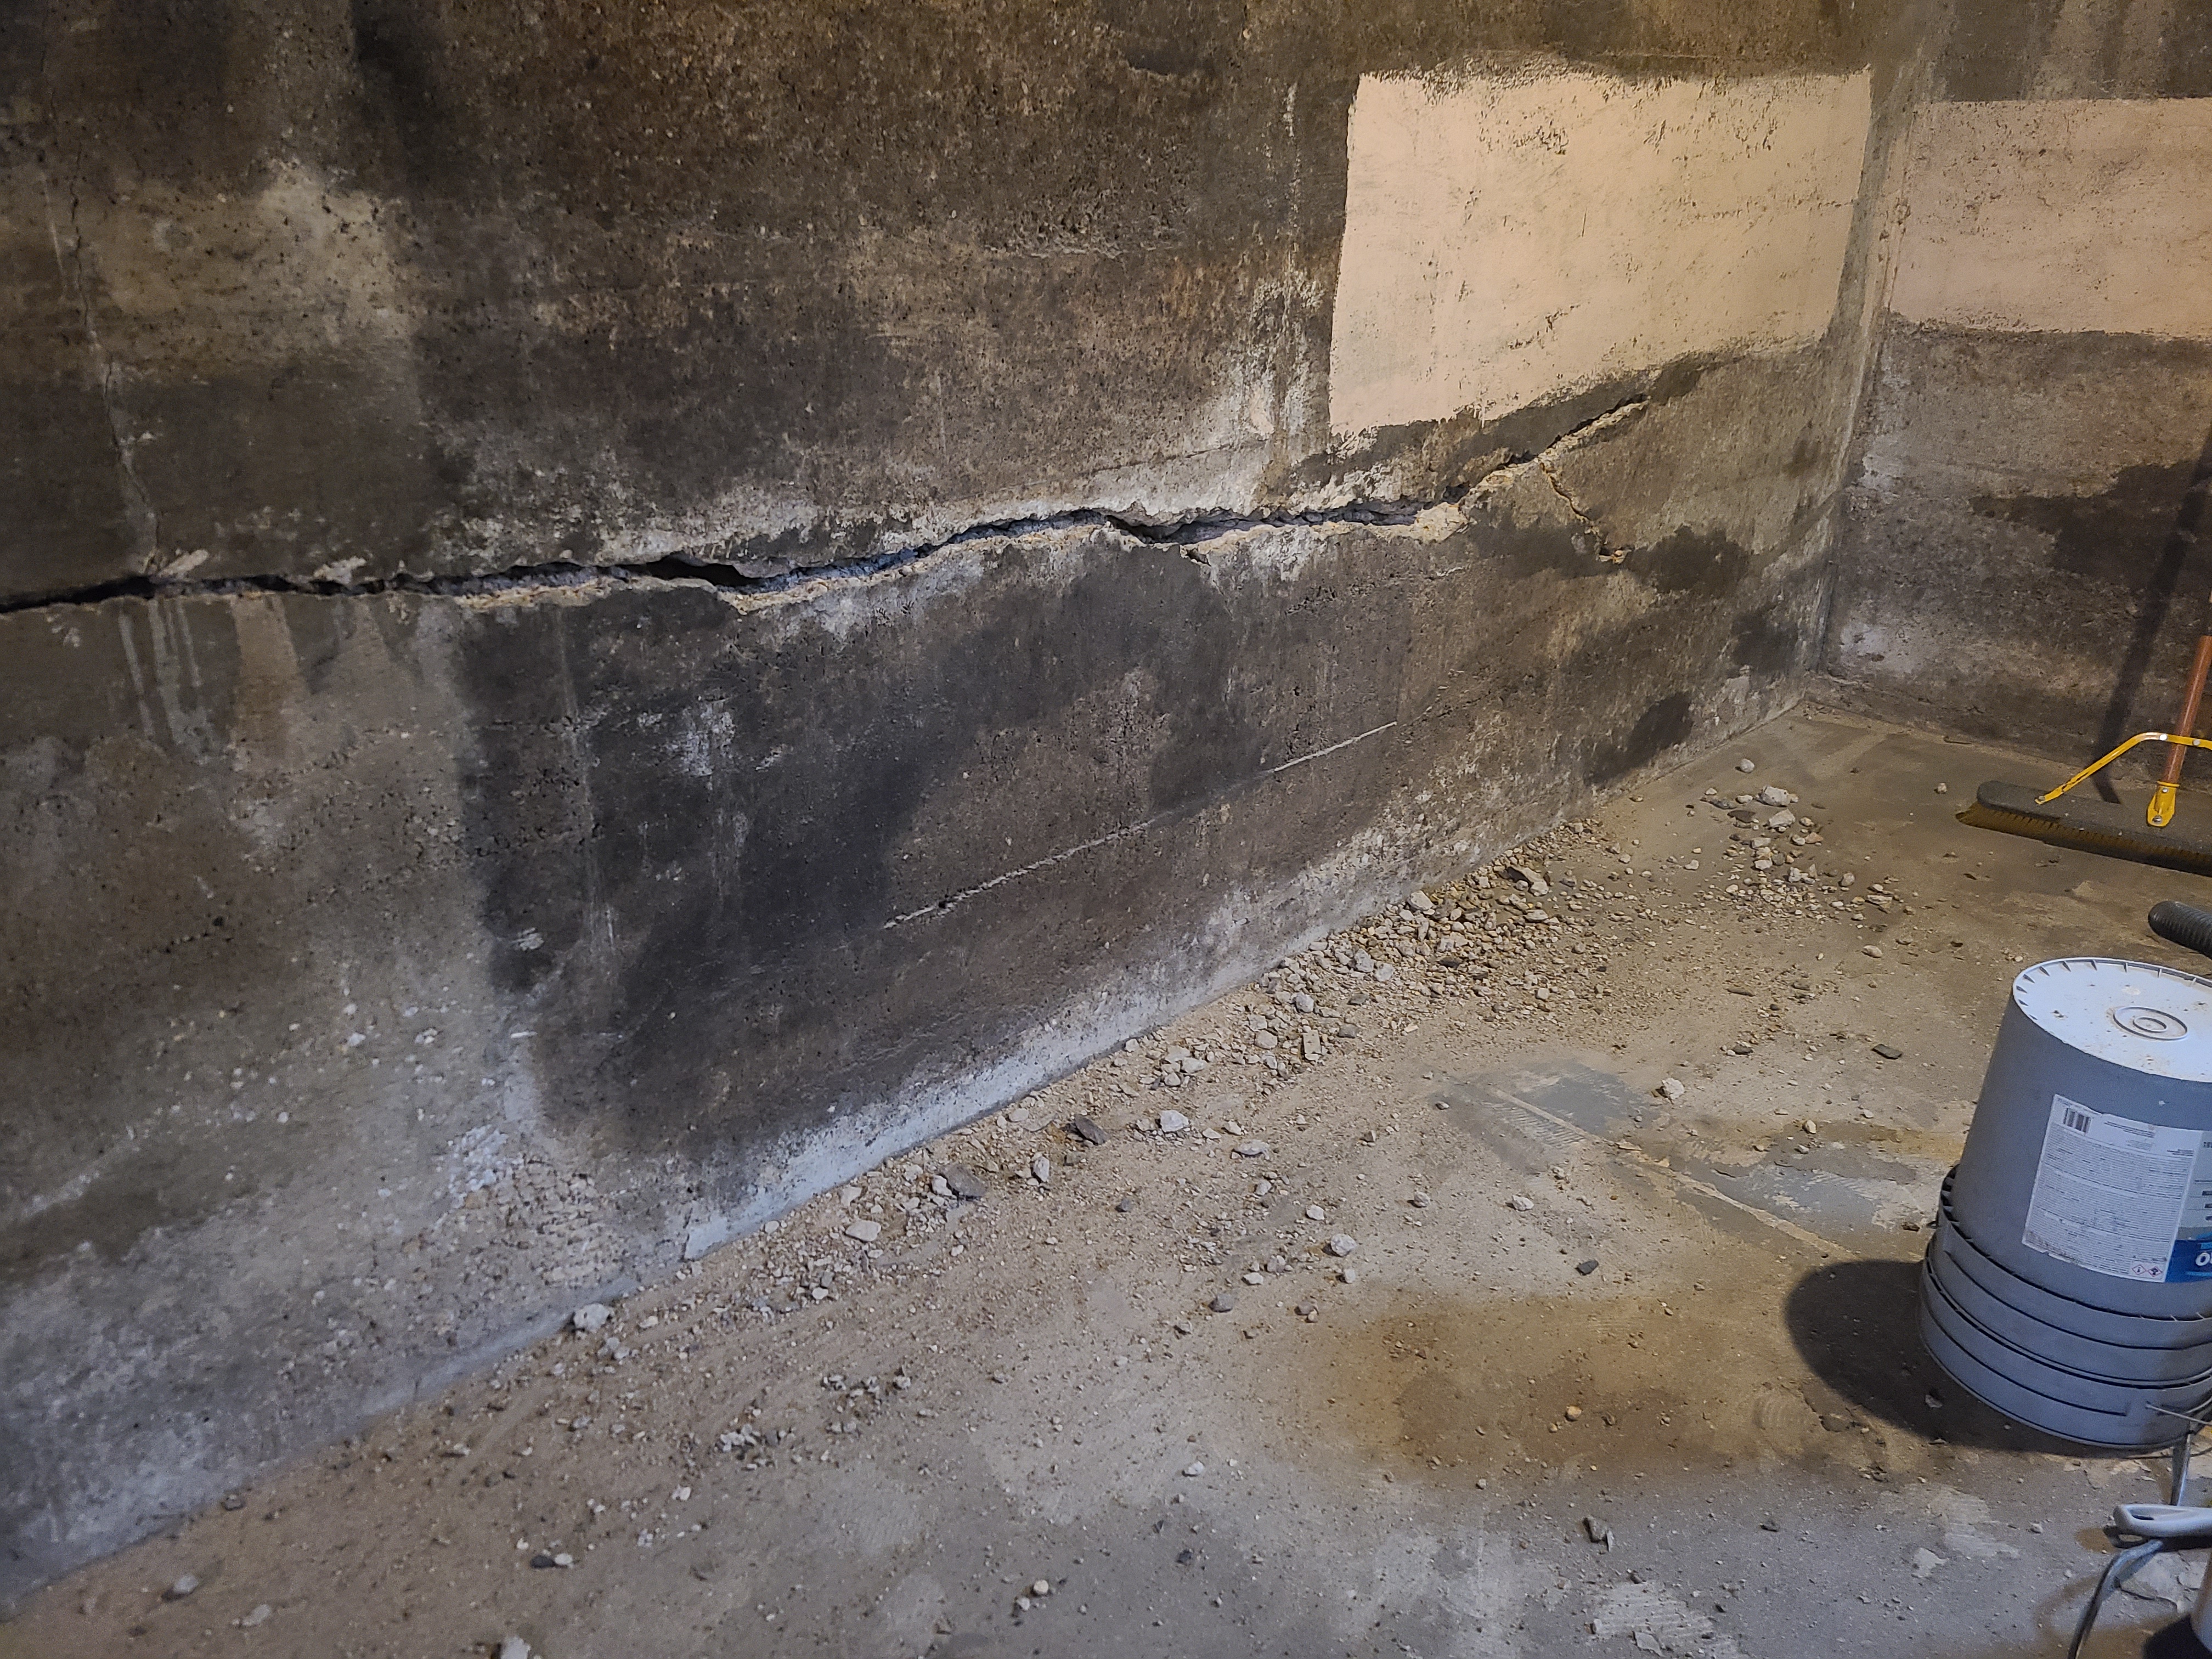
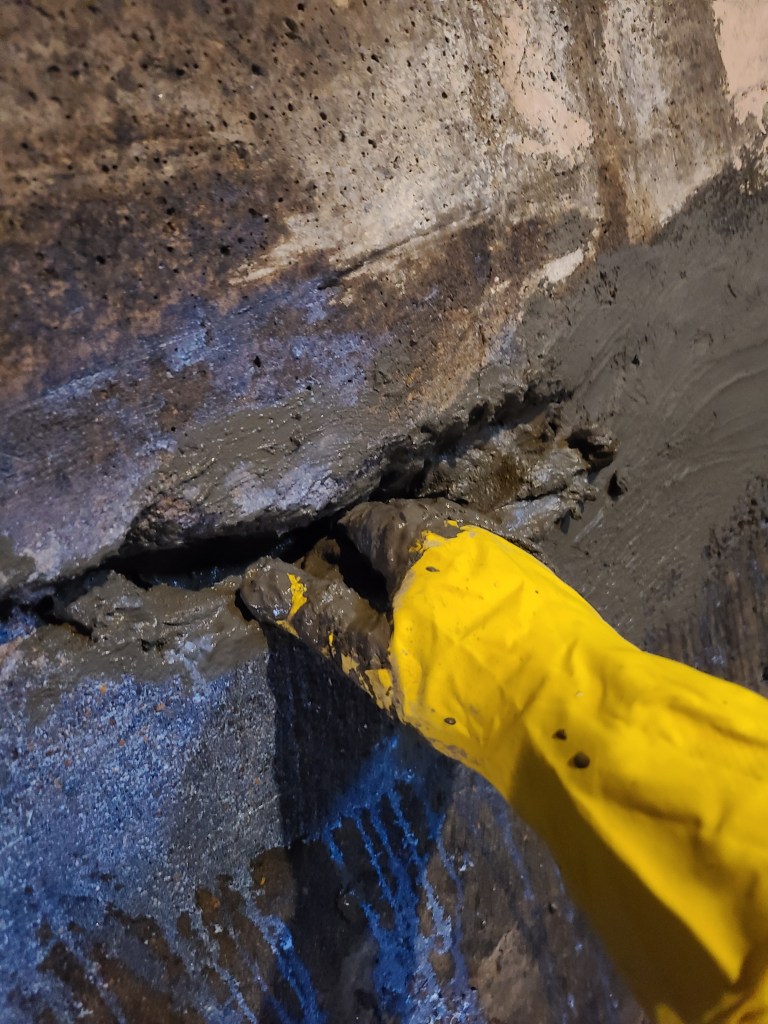
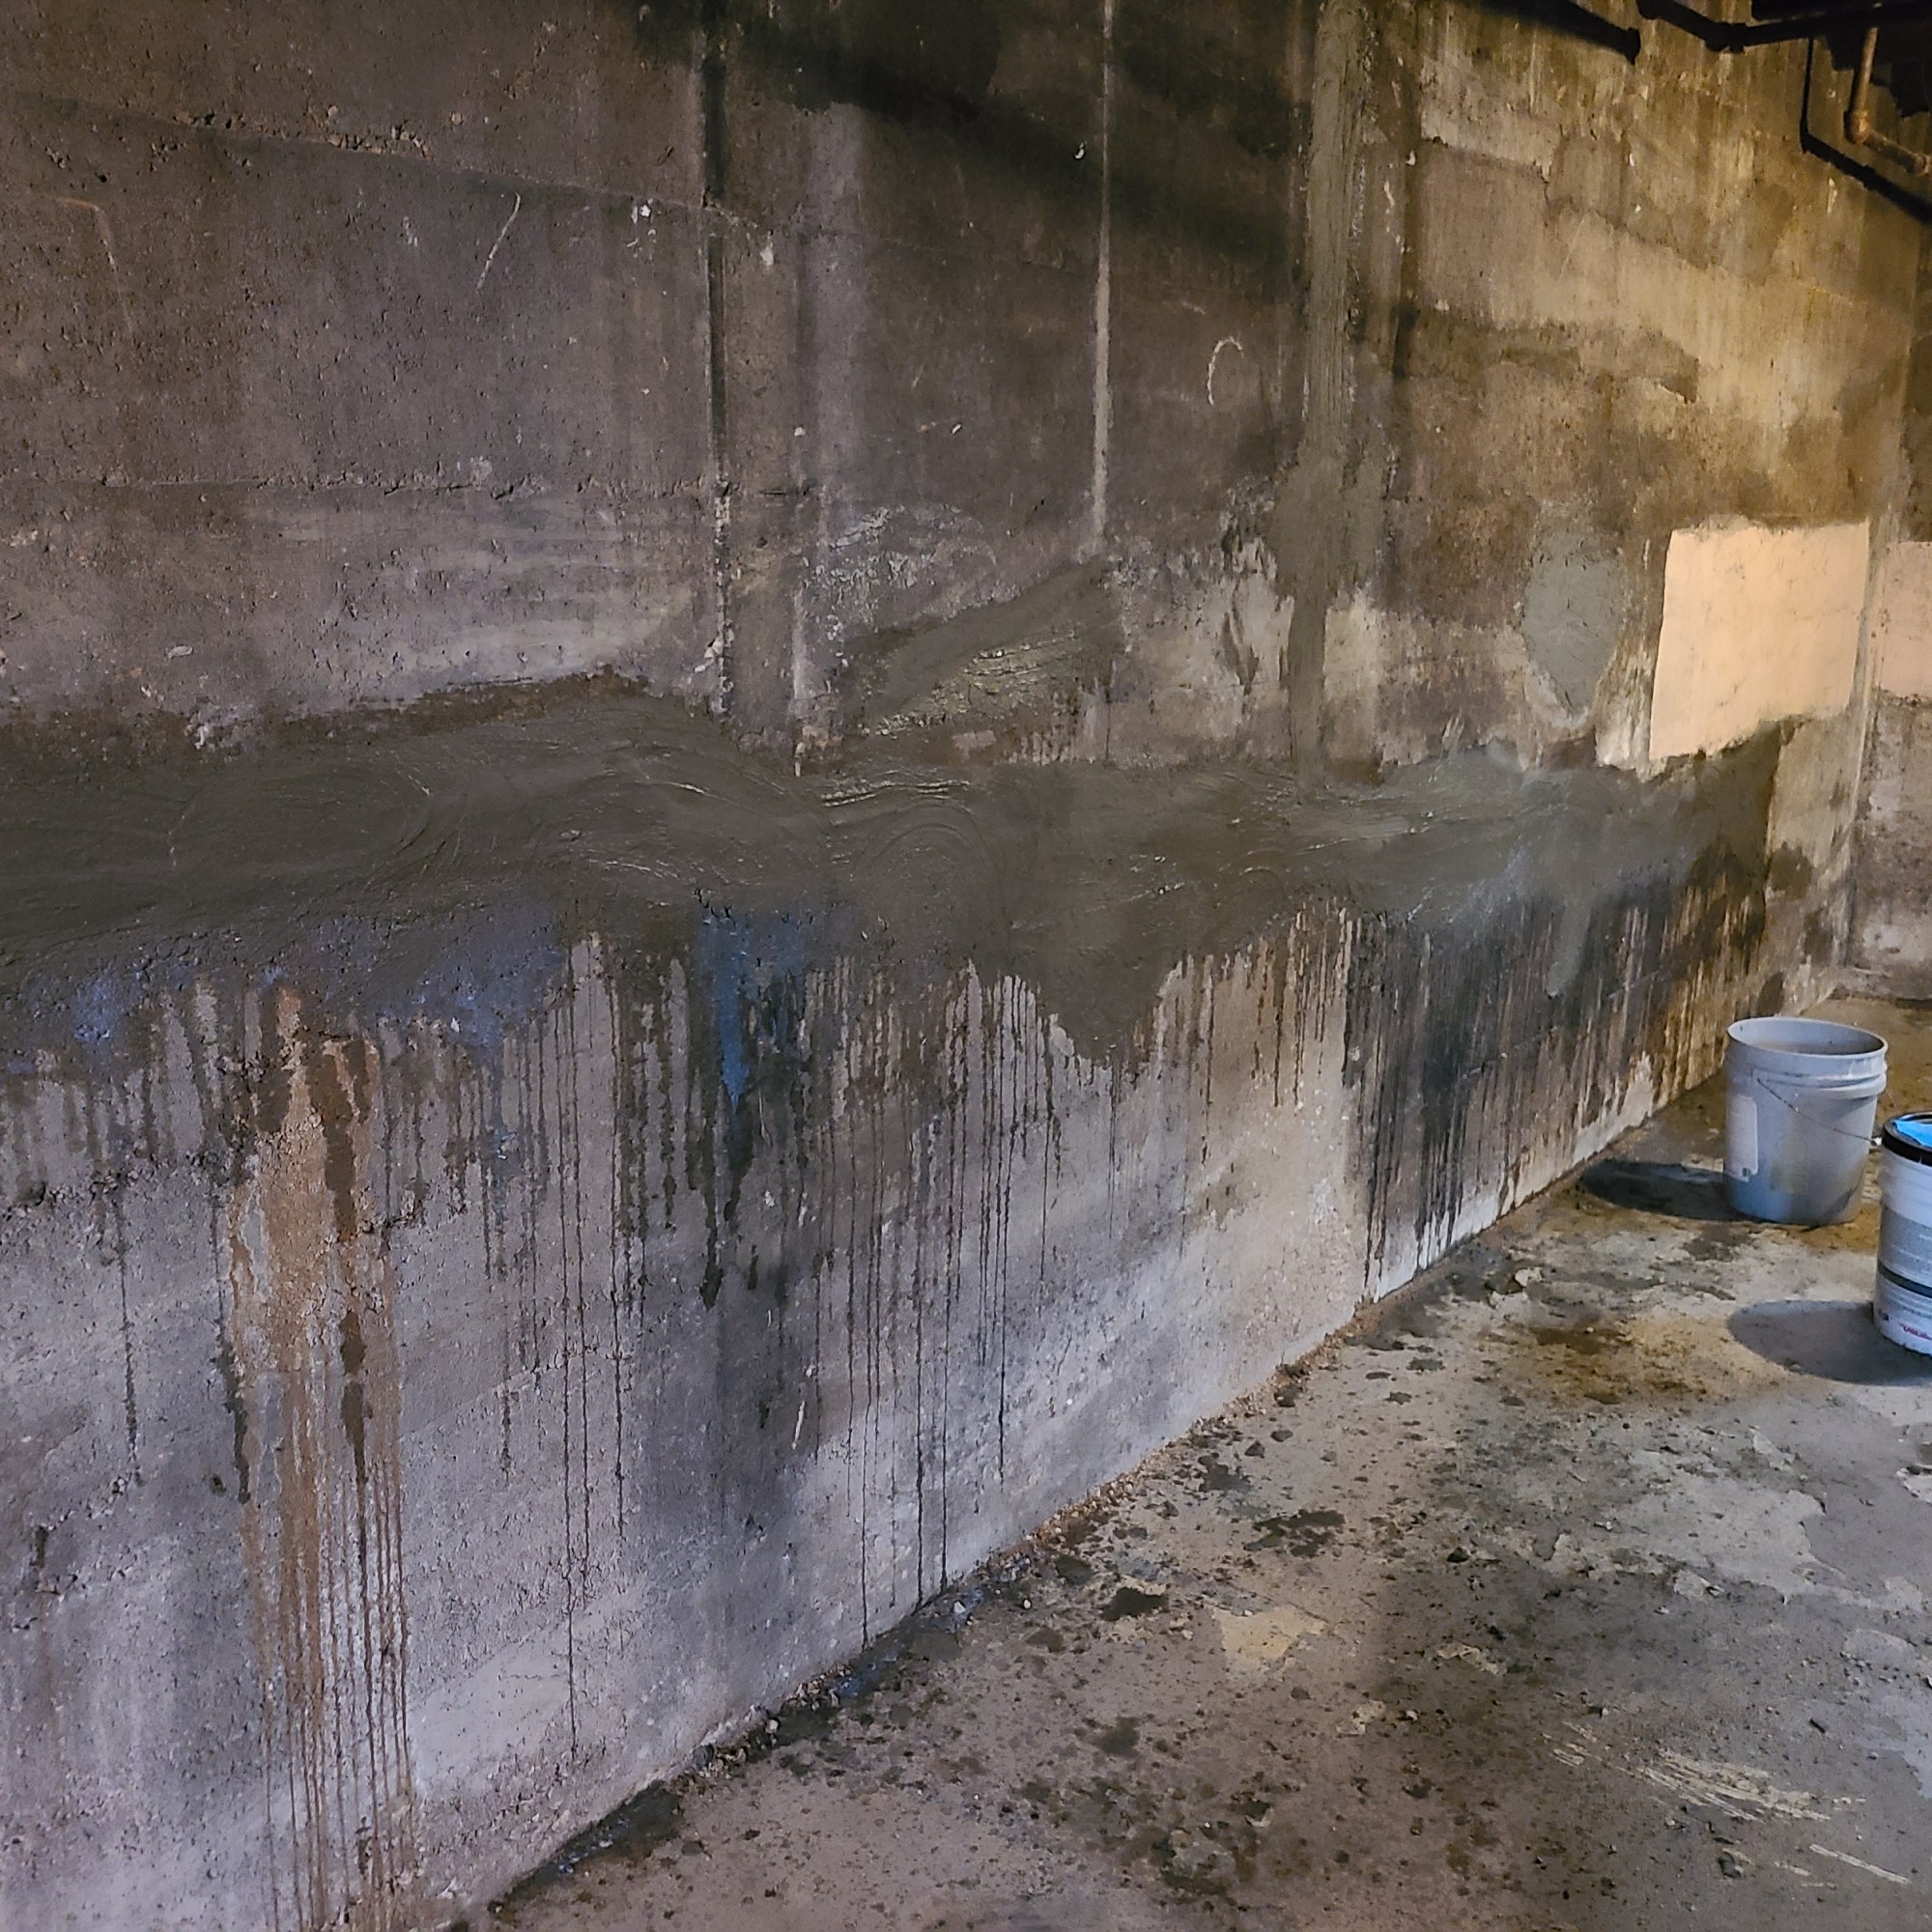
When we removed the old drywall and studs, we discovered a wide crack in our basement wall. There wasn’t any indication of water leaking in, but it was crumbly and old in place. I would have to fix it. I’ve never repaired a crack like this, so this was going to be another learning experience! Google and YouTube were my instructors.
First I had to open up the crack with an air hammer. (Another use for the new air compressor!) Your supposed to chip away material to create and undercut that will hold the cement in place after the repair. However, they really knew how to make cement a hundred years ago. It was very hard and stubborn in places.
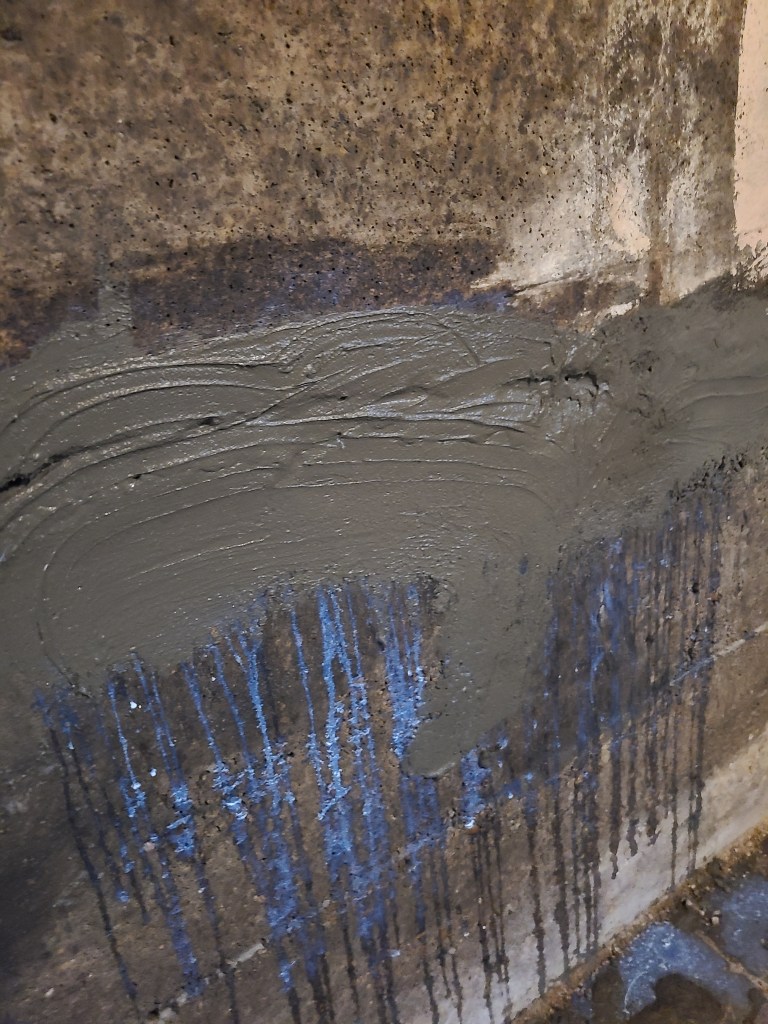
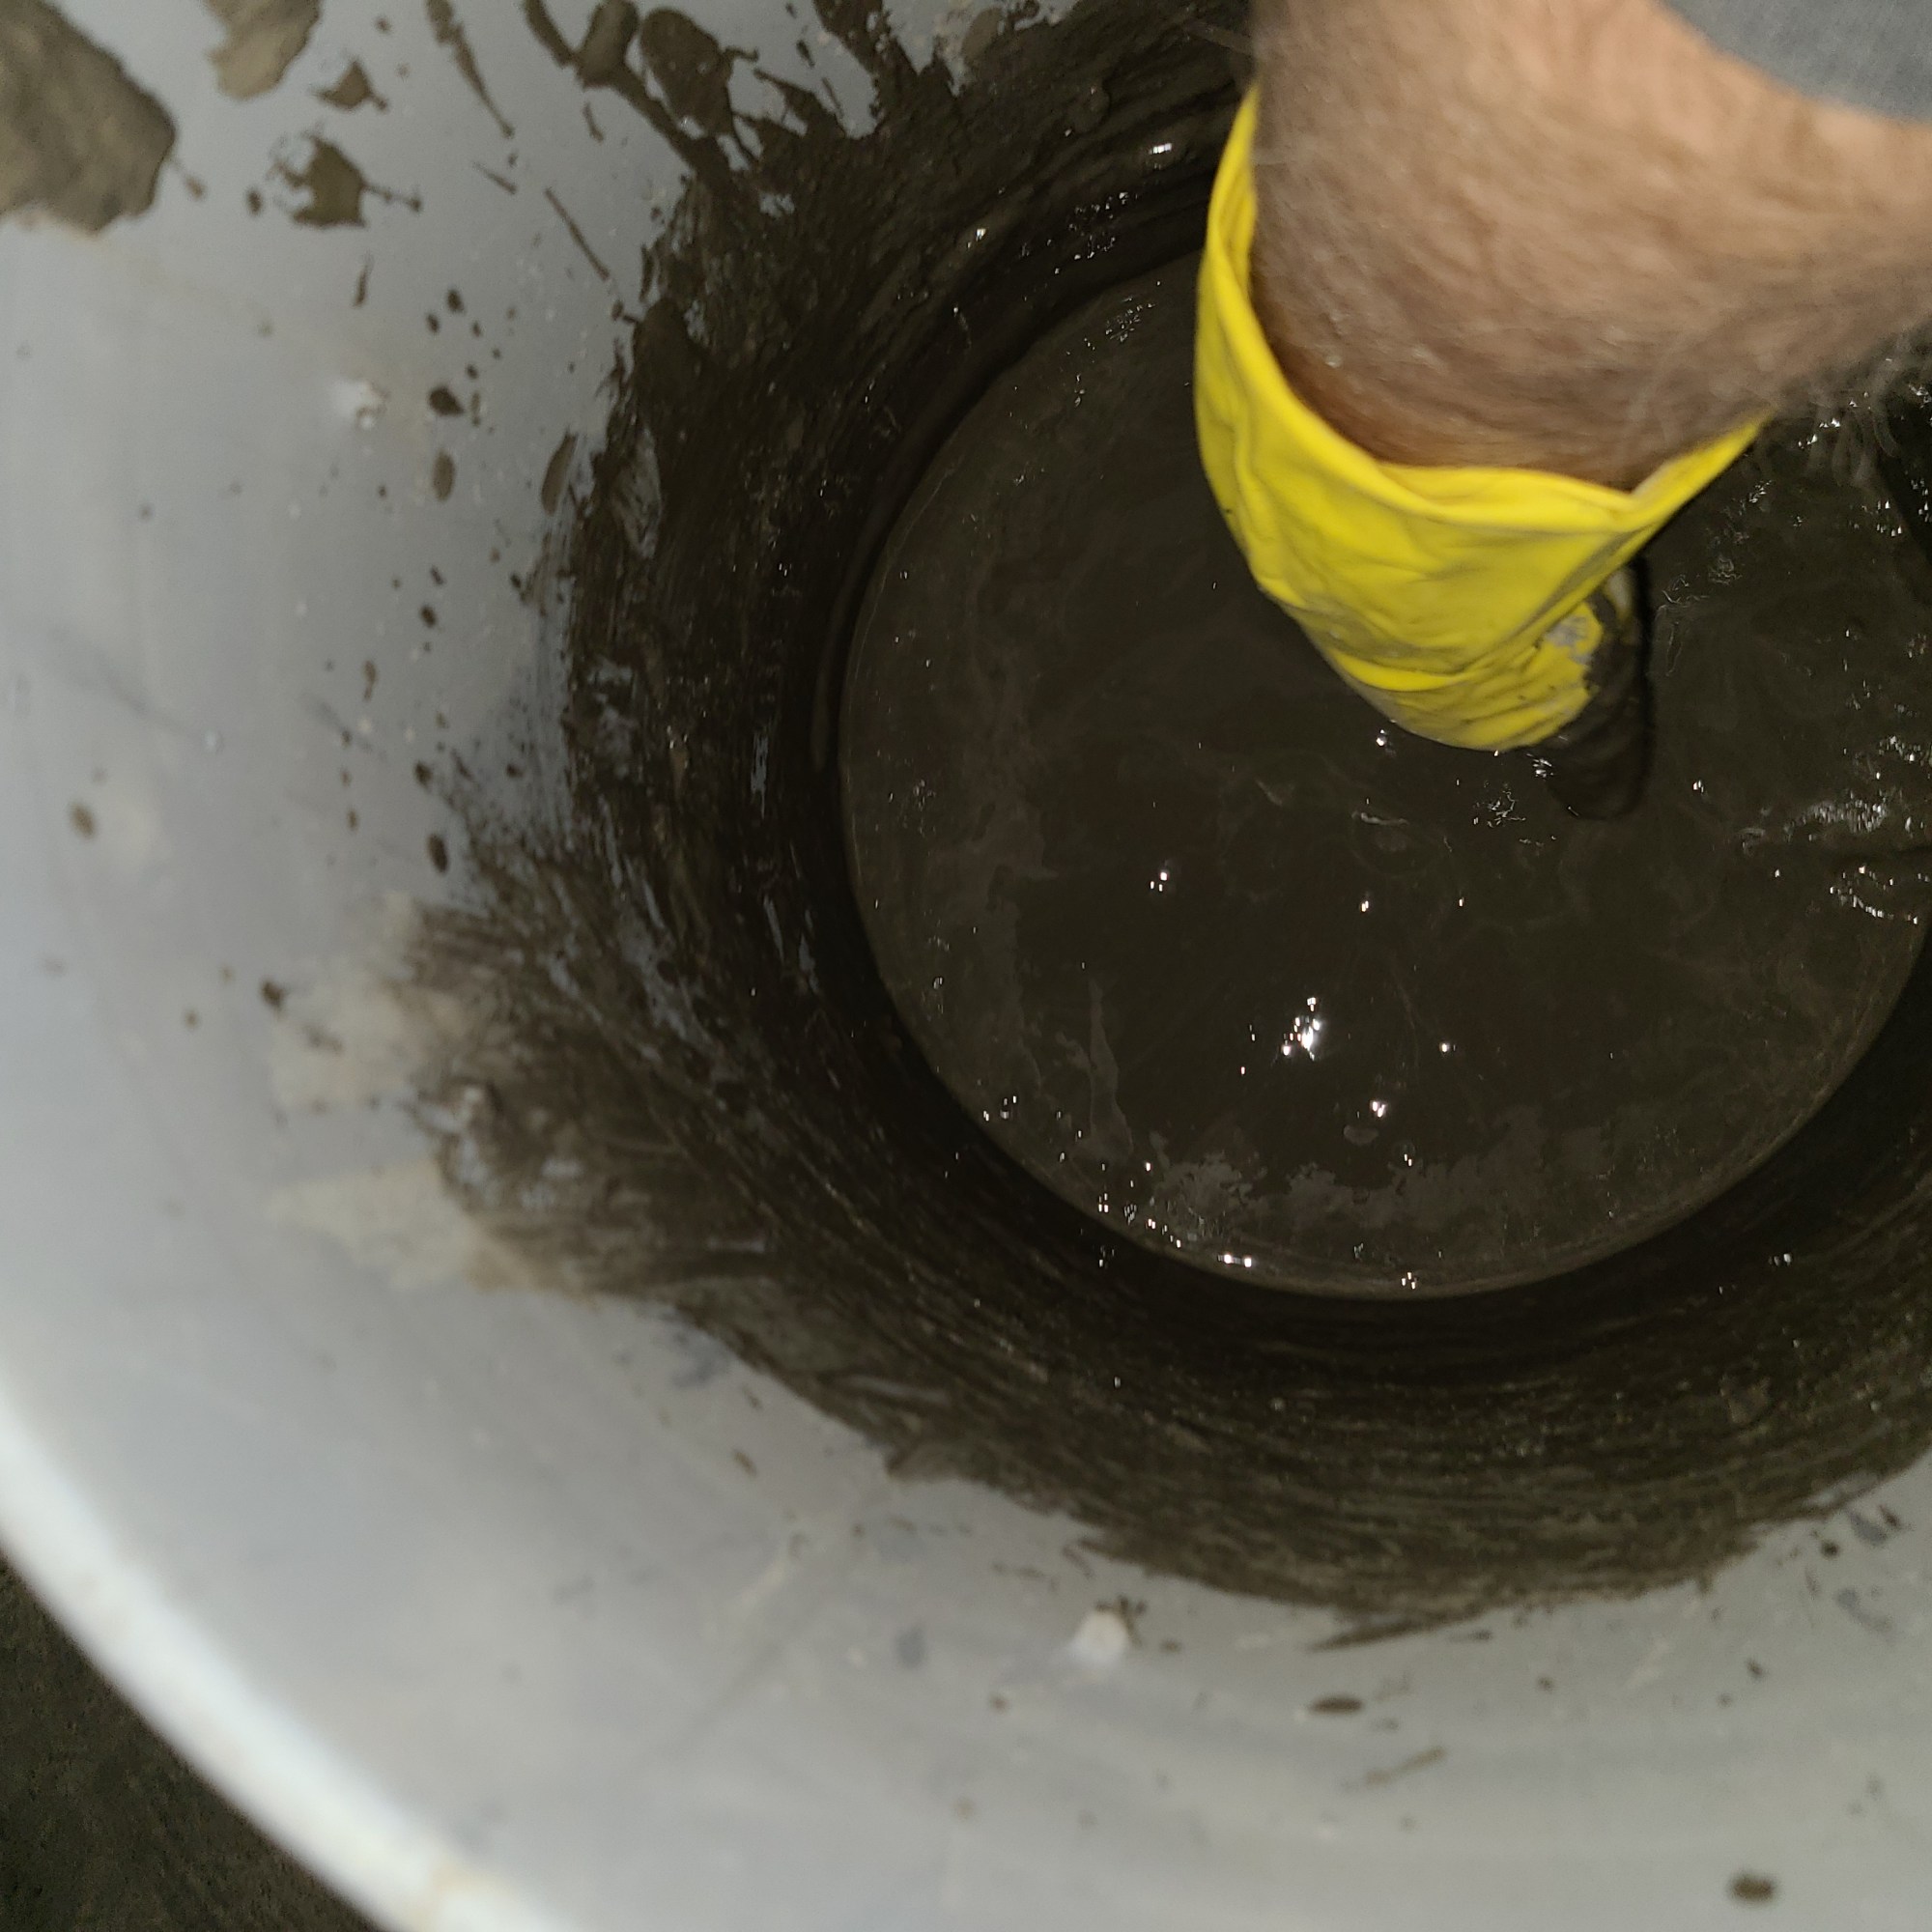
The repair itself was a bit of fun. Once all the loose dust and dirt was blown out of the crack, I used my gloved hands to squeeze cement deep into the back of the crack. Hydraulic cement is a very finely sanded mortar that sets up FAST. You only mix what you can use within about three minutes. By that point it starts to harden and stick to the bucket.
The cement is mixed really thin so you can squeeze it into the small recesses in the wall. Again, I used my gloved hands for this. It’s very much like playing with mud. I enjoyed it thoroughly and expect I will be using this stuff more often. I’m not sure for what, but it’s too cool of a material not use for something.
I forgot to stick with original title heading through these posts so I’ll have to go back and fix them.
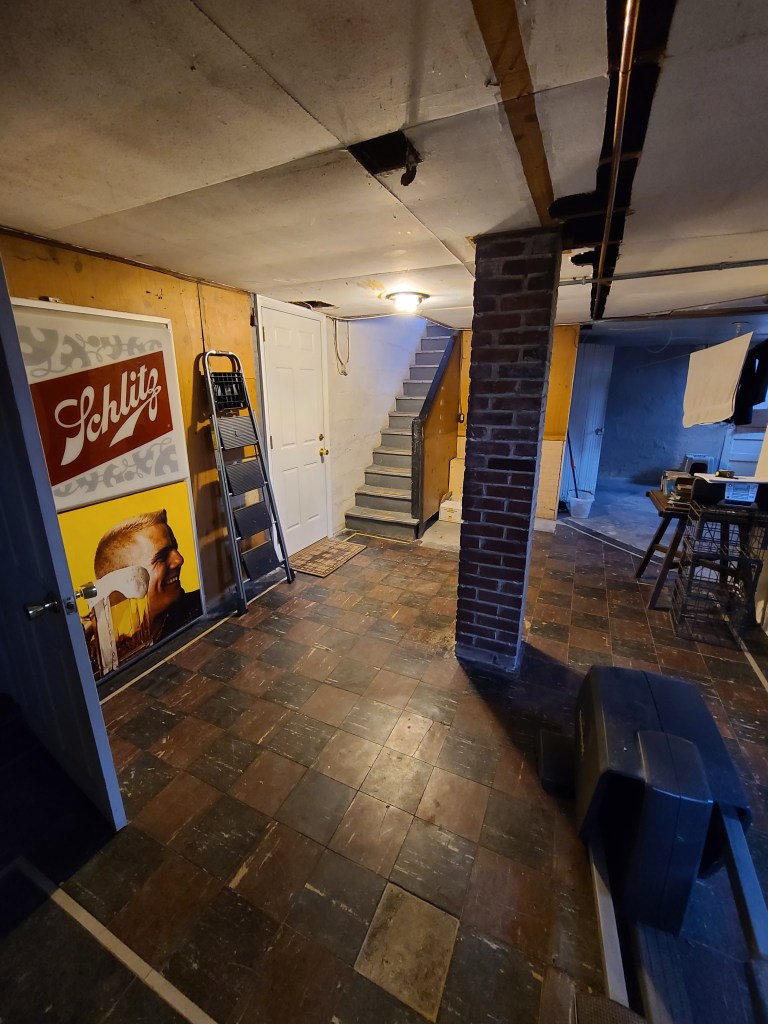
But over the weekend we tackled the basement. We installed insulation on the concrete walls and began stripping the paint off the brick columns.
Our theme for the basement will be a mix of steampunk and Irish pub. The ceiling rafters, pipes, and bare brick will give the open industrial feel we are looking for. Mechanical accents will be added later. For now we’re building out the walls.
Originally we intended to leave the concrete bare or maybe add some paint or even brick overlay, but after some research we decided that it would be best to cover it in order to limit any heat loss or moisture buildup. This will be our TV/family room; I don’t want it to feel dank and basement-like. We will be framing up the walls this next week.
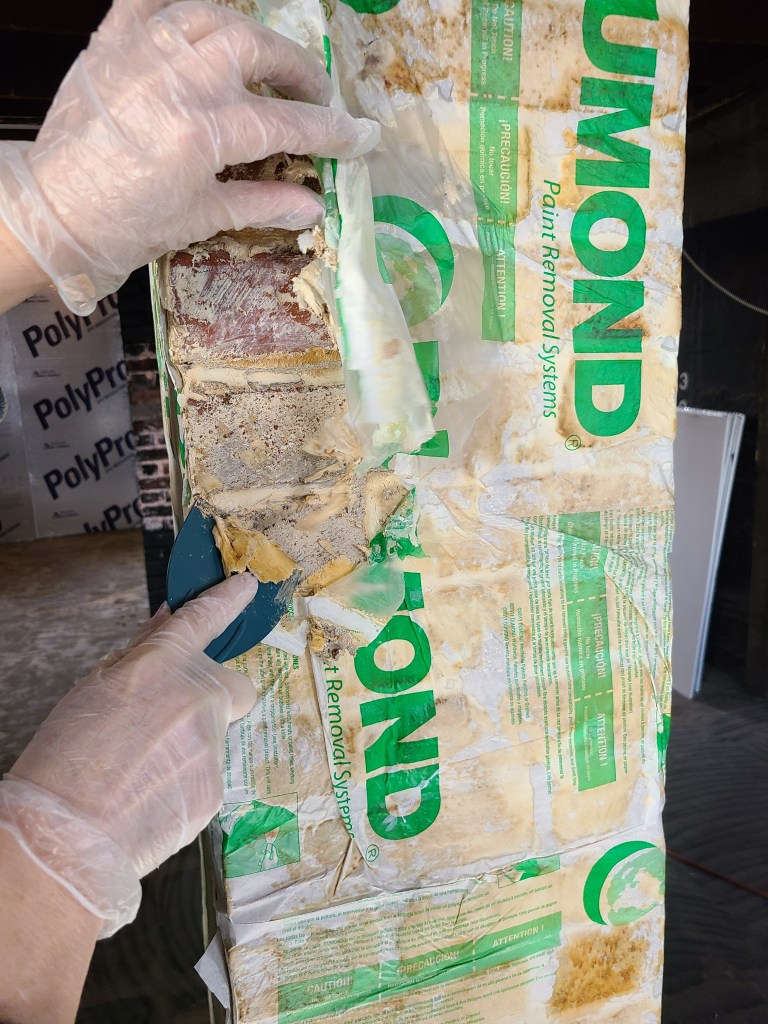
Sheri’s task was to remove a hundred years worth of paint. There are four of these and we want them to be bare brick. We tried several methods to remove grind or sand the paint off, but that turned out to be a bad idea. First, it didn’t work well at all and second, there is a very good chance that there is lead in the older paint. So, we gave up on that idea.
We tried a chemical stripper called, Citristrip. An orange gel that did absolutely nothing to this paint. The paint softened a little bit but not enough to remove it.
However, we had a savior in the paint industry. My wife happens to work for a distributor of chemicals used in paint. And the VP happens to be a chemist. Sheri called him with our problem and he had an immediately solution. Peel-Away from Sherwin-Williams. It is packaged as a kit in a bucket with everything you need. It is white paste that is brushed on and then covered with a special paper. Sheri applied it on Saturday and when she removed it on Sunday the paint peeled off in chunks! I was amazing. The product liquifies the paint, allowing it to be scraped off easily. There were multiple layers of paint on the column and it turned out beautiful. Peel-Away is an amazing product for anyone working with layers of old paint. We really had only one complaint: there is only about half as much special paper as you need to use the entire bucket. I suspect it is a marketing ploy. We’ll need more paste and paper to finish the remaining columns, but now we know how to do it. And the result is amazing.
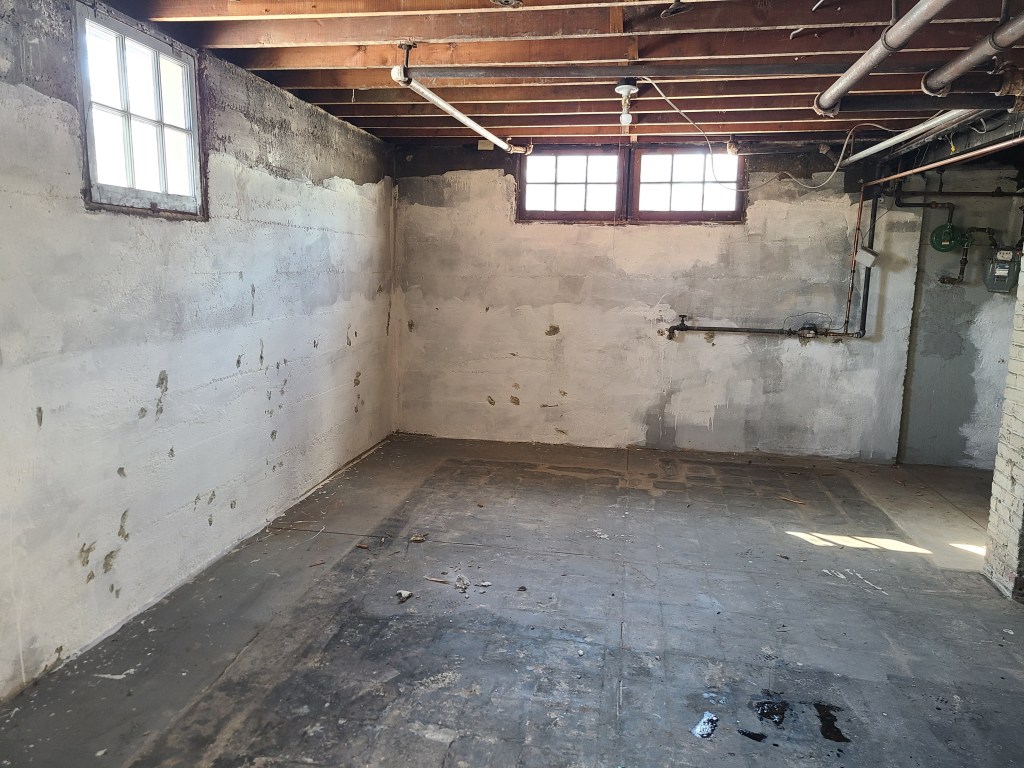
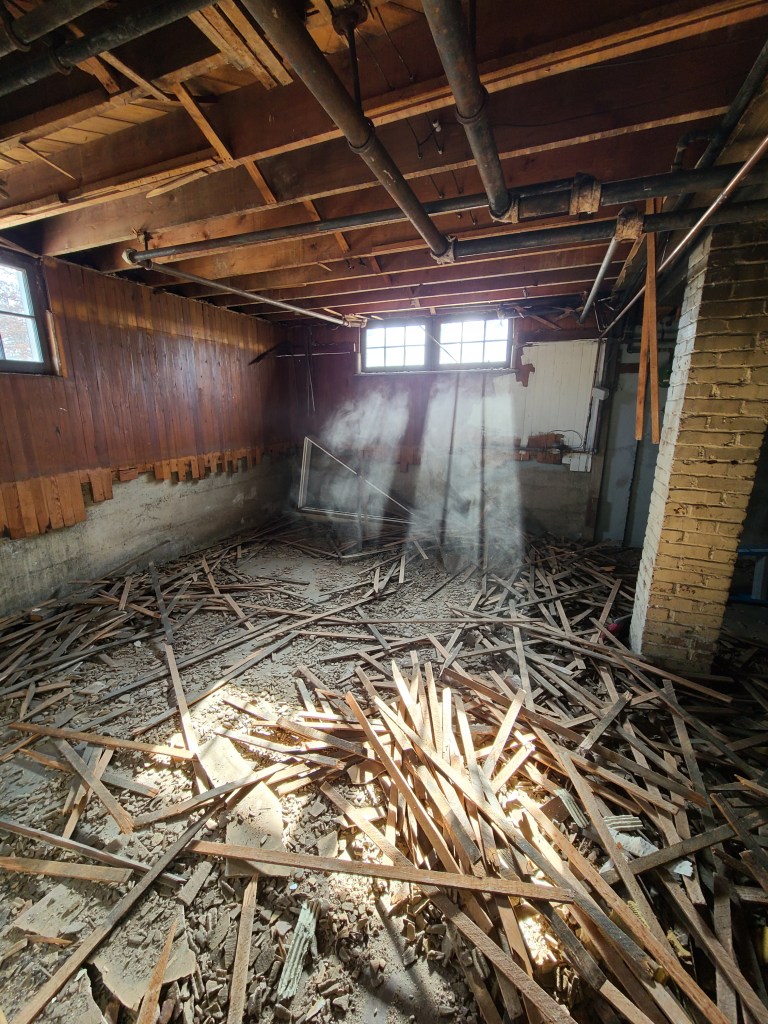
Our one hundred year old house had a finished basement at several points in its history. The latest iteration included a dropped ceiling, a 3/4 bath and even an Oakland Raiders room sometime after 2016. However, at the time of our purchase it was moldy, damaged and partly gutted. Our project over the last two weeks has been to remove the ceiling and Raider room.
We discovered that the original century-old plaster and lath ceiling was still extant but hidden by the dropped ceiling. Someone had added the dropped ceiling to cover up the heating and plumbing pipes. But it also lowered the ceiling of the room by 18 inches. Removing it will give us a basement with an 8 foot ceiling! We also revealed the knob and tube wiring that still powers the house. Some of it had been added after the original ceiling was installed. There were wires running all over, many that no longer connected to anything.
Our biggest surprise was to discover that we had asbestos pipe insulation on our hot water heating pipes. This detail was not mentioned in the sellers documentation. However, instead of being upset about it, I just removed it. We suited up and pulled it out.
We then pulled all of the plaster and lathe ceiling work down, along with 100 years of dust. It was seriously nasty work. I wanted it all down in one weekend so we could be done with it. The three of us tackled it and got it completely pulled down. A dumpster will be delivered this week and we will spend next week loading it up.
Our new basement will have an industrial theme with a little steampunk bar area. All of the pipes and wires will be exposed and I’m leaving the ceiling bare up to the joists and subflooring above. It’s going to be cool. Trust me.